Export
The  Export feature from RigFlow allows you to save your data in a preferred format for further analysis or reporting.
How it looks
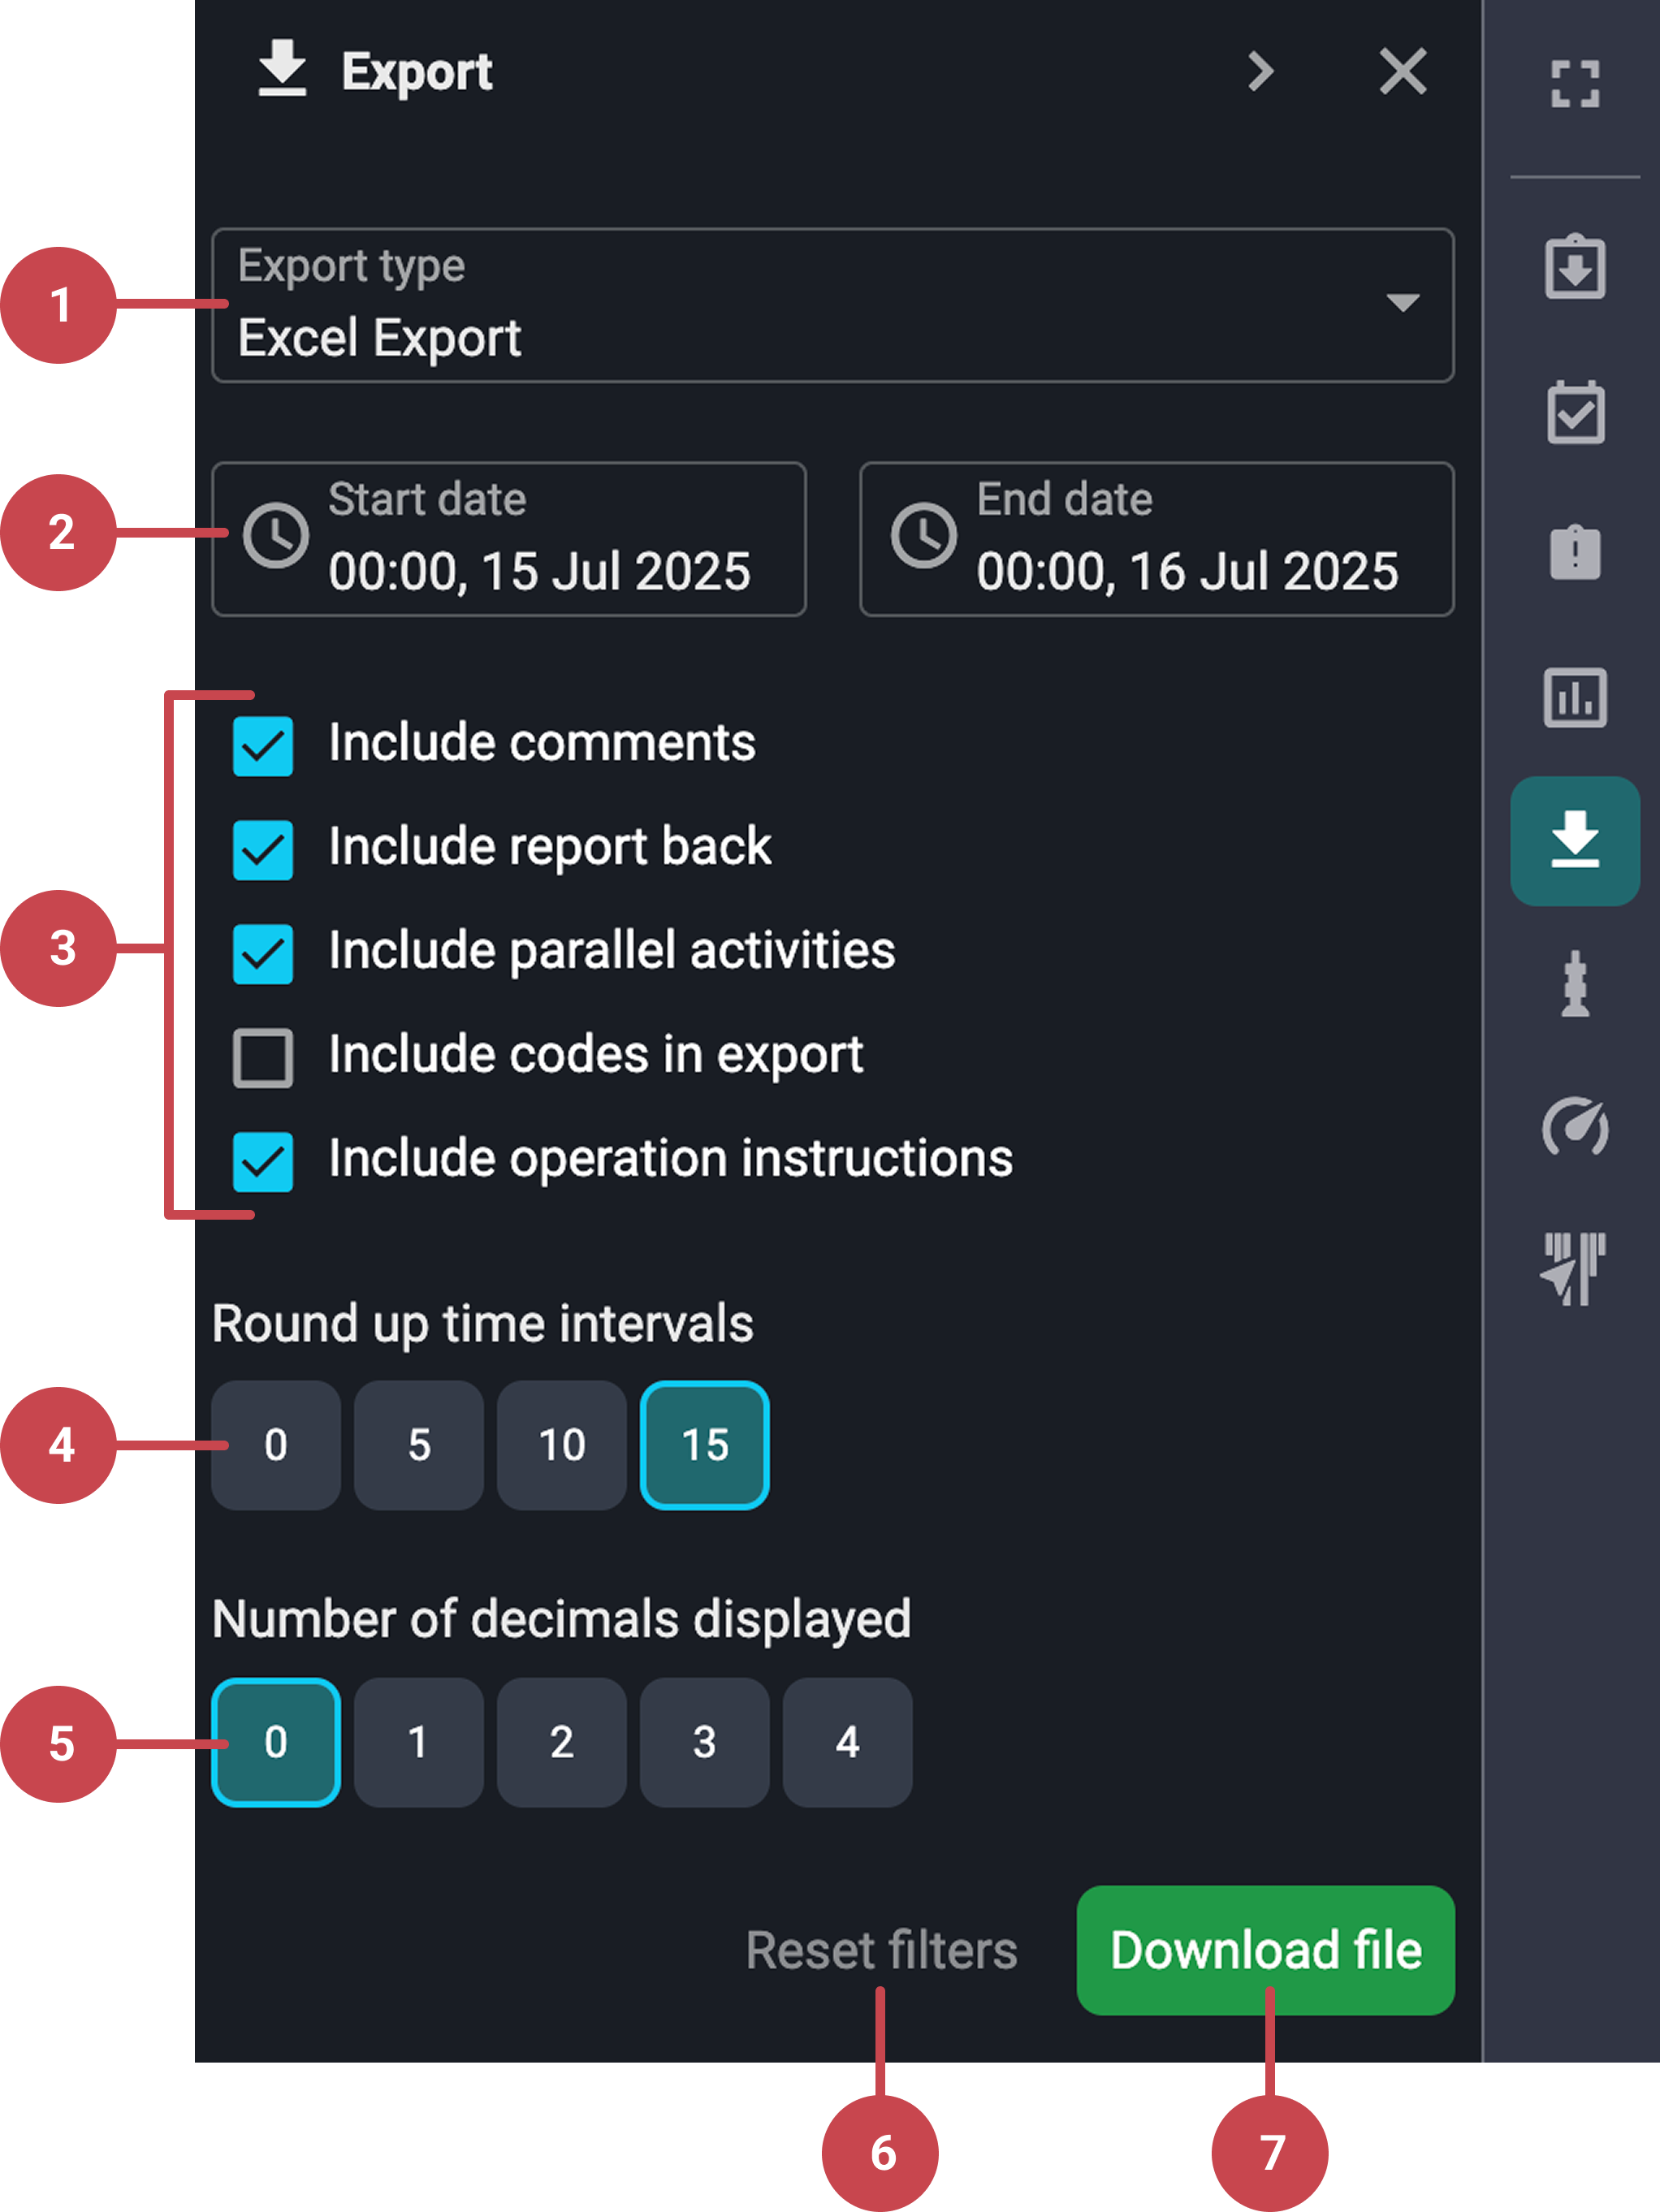
Export type: Select the file format you want the export to be in (e.g., EDRS, IDS, Excel).
Date range: Define the start and end date and time for the data you wish to export.
Export settings: Choose which elements to include in the export. For more details, see the Export settings guide.
Round up time intervals: Automatically round time values to the nearest defined interval. For example, 28 minutes will round to 30 minutes if using a 5-minute interval.
Number of decimals displayed: Specify the number of digits to show after the decimal point (e.g., 10.00).
Reset filters button: Useful for quickly restoring standard export parameters. It becomes active once you've changed any settings from the defaults.
Download button: Click to generate your export file. The file will either download automatically or prompt you to save it manually.
Notice
The available options and layout in the export screen may change depending on the selected export type (e.g., IDS Export vs. Excel Export). Always double-check your selections after choosing an export type.
Step-by-step instructions
Exporting Data
Open the Export: Find and click the
Export icon located in the Right sidebar.Select export type: Choose the format you want to export to, such as Open Wells, Excel, or NDOR.
Set date range: Select the Start date and End date for the period you want to export data from.
Configure settings (if needed): Depending on the export type you selected, additional settings may appear. Adjust these as needed. For more help, see: Export settings guide
Start the export: Click the Download file button to begin. A dialog box may appear to confirm your selections.
Save the file: Once the export is complete, you will either be prompted to save the file or your browser will automatically download it. Choose a location on your device to save the file if needed.
Export settings guide
Include headers in CSV export: Adds a descriptive header row to the exported file, making the content easier to read and organize.
Include comments: Includes any operational comments attached to steps or actions in the export.
Include timestamp on comments: Adds a timestamp to each comment, providing context for when comments were made.
Include report back: Exports any report-back content listed under each corresponding step.
Include parallel activities: Includes steps performed outside the primary sequence or lane.
Include codes in export: Adds relevant codes to each entry, as defined by planners or recorded in the operation log.
Include operation instructions: Includes any available instructions associated with a step or action.
Tips and tricks
Ensure Data Accuracy: Before exporting, double-check your data selections and filters to ensure that the export includes all necessary information.
Check Format Compatibility: Make sure the chosen export format is compatible with the software you plan to use for further data manipulation or analysis.