Rig Page
Rig Page is a centralized dashboard designed for users on drilling rigs. It provides a real-time overview of activities and data related to a specific rig. This tool is accessible through both RigFlow and RigBridge and is intended to enhance situational awareness and streamline operations by consolidating key information in one place.
How it looks
Rig Page is composed of modular sections called widgets, each displaying different types of rig-related information. The layout contains a default set of widgets that adapts to different screen sizes with a grid structure.
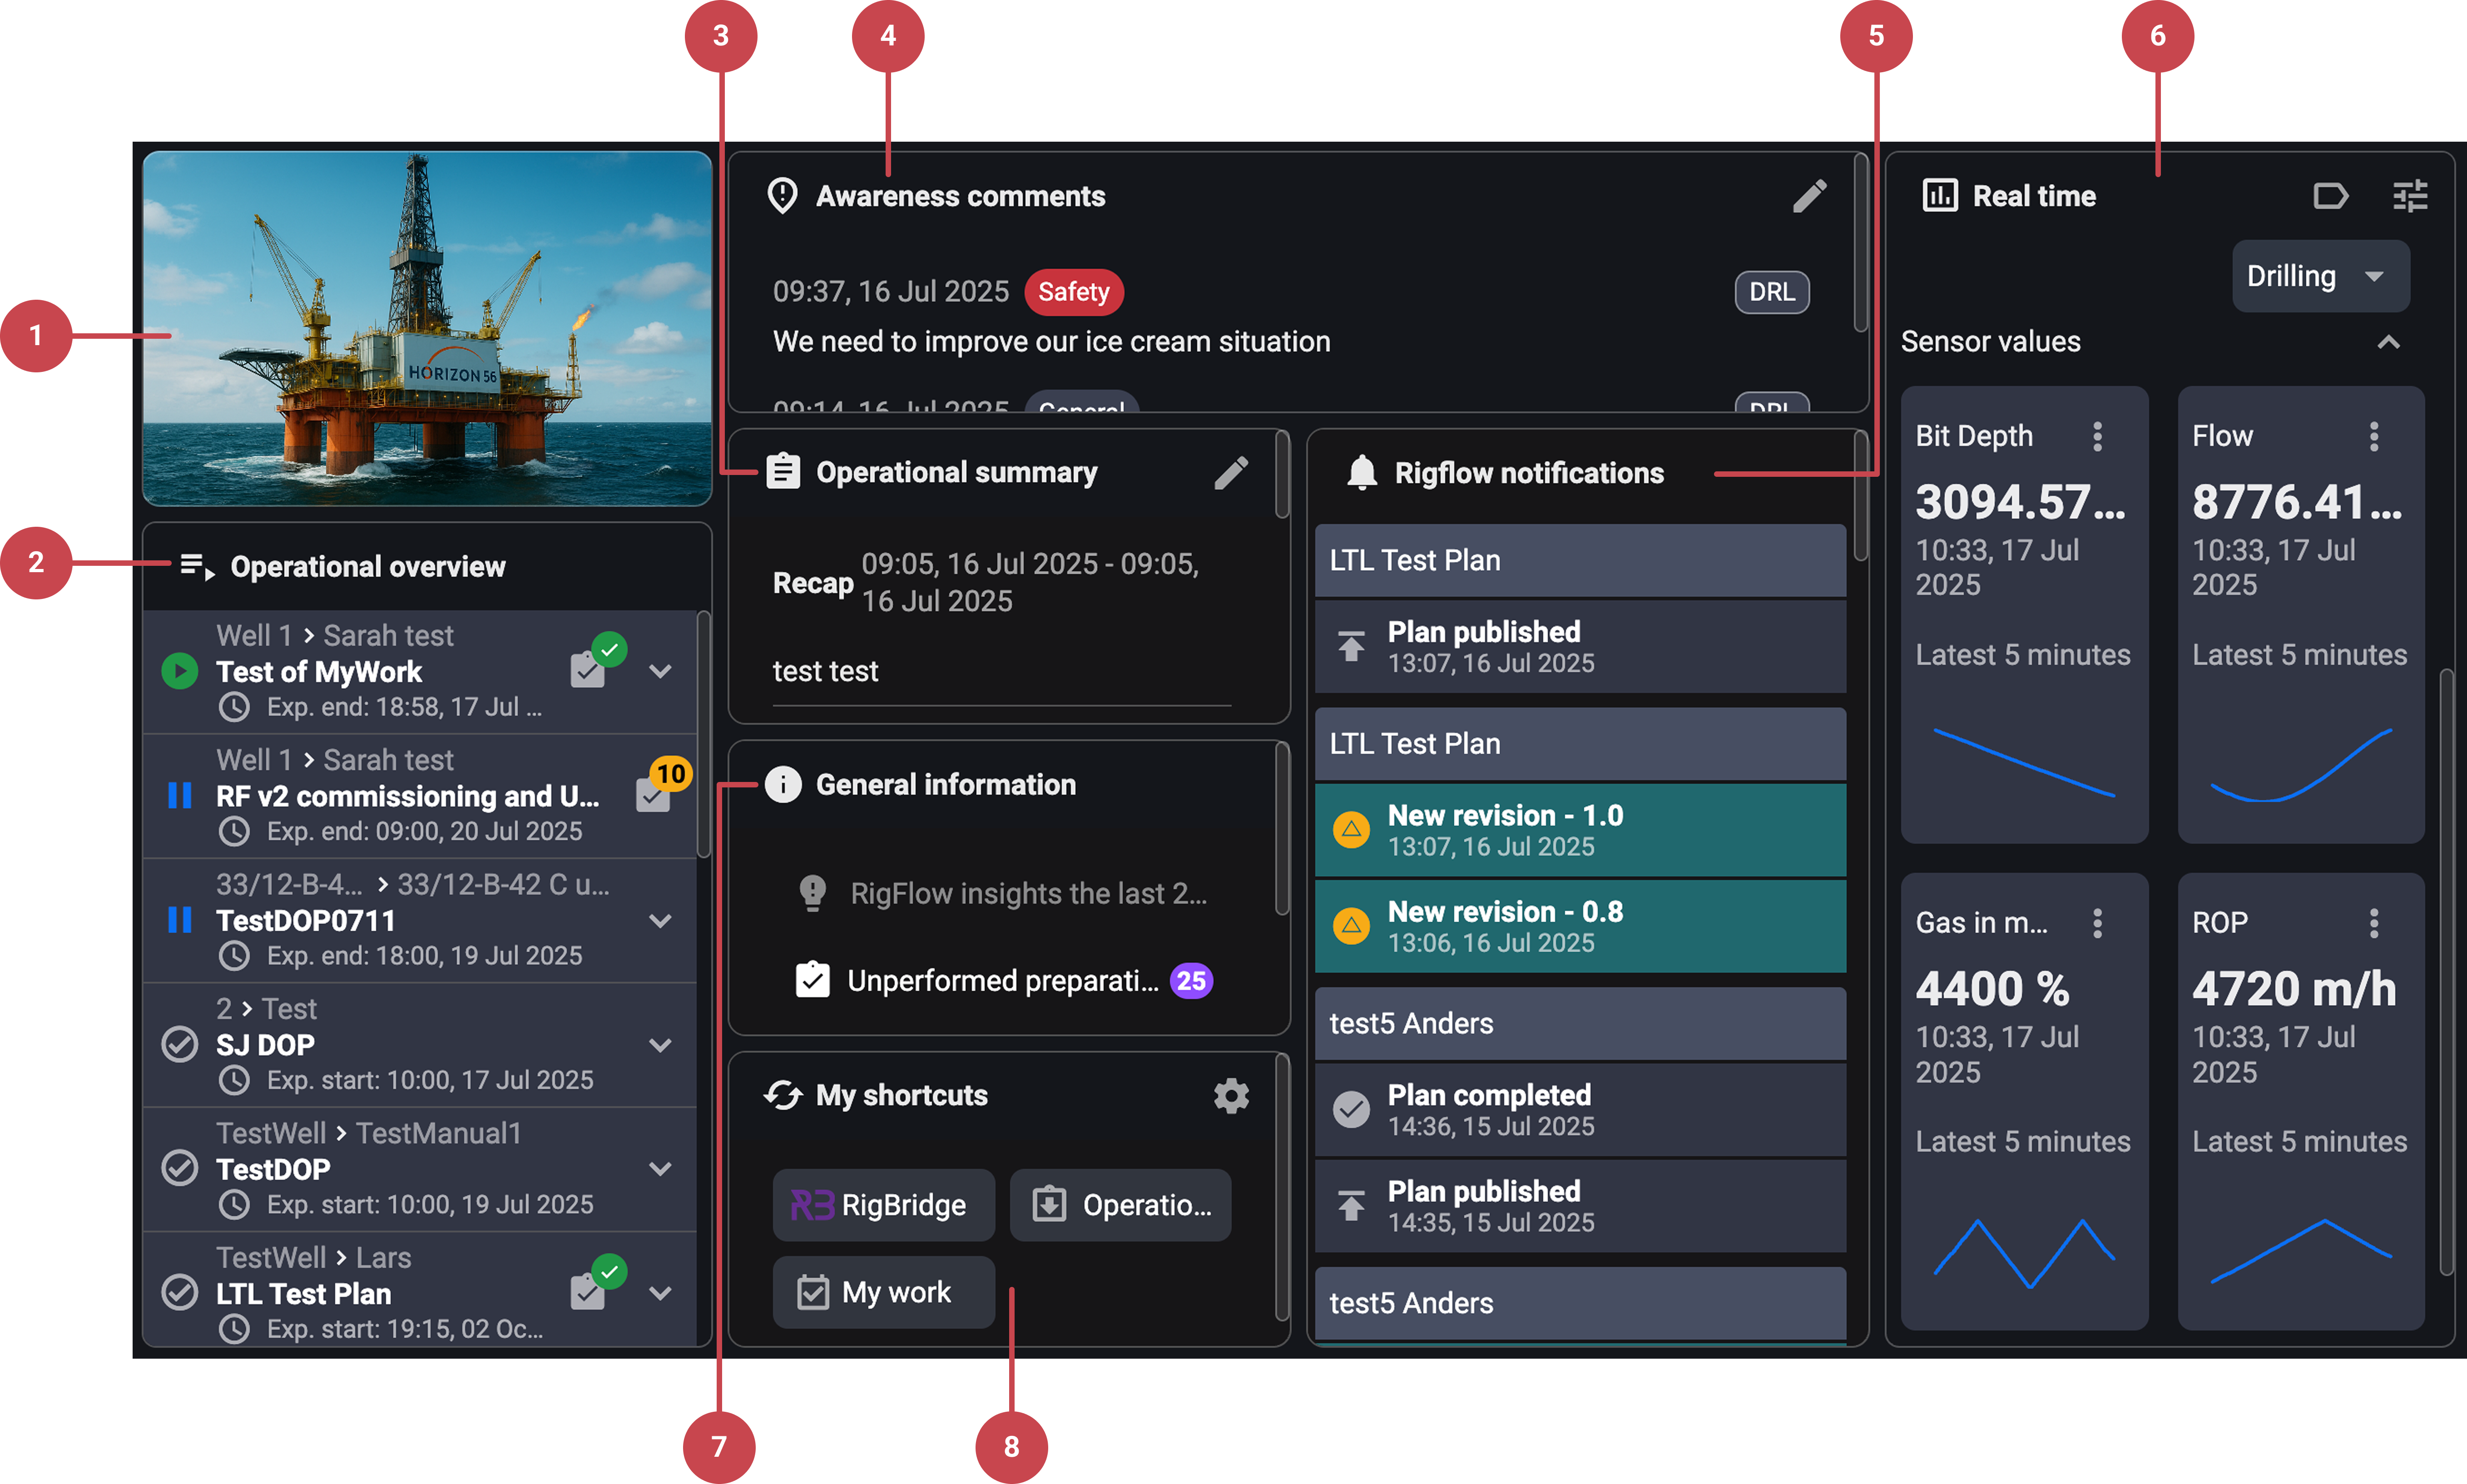
Initial widgets include:
Rig picture: A visual identifier for the rig, mostly for aesthetic use.
 Operational overview: Current and upcoming operations. Read more about the Up Next feature here: Up Next.
 Operational summary: Displays manually entered summaries of drilling activity. It’s organized into two parts:
Recap - covers completed operations.
Upcoming - outlines what’s planned next.
 Awareness comments: User-added notices for safety, logistics, or general information.
 Notifications: Alerts relevant to your current app. Read more about notifications here: Notifications
 Real-time: Displays live metrics. Read more about the real-time app here: Realtime data.
 General information: Insights from the past 24 hours, unperformed preparations, completed actions, and upcoming milestones.
 My shortcuts: User-configurable links to tools.
Step-by-step instructions
Accessing Rig Page
Access Rig Page: Navigate to the Left sidebar , and click on the
 Rig Page icon.
Managing operational summary
Open the edit window: Click the
 edit icon on the operational summary widget to open the window.
Add recap and upcoming information: Write an upcoming and/or recap summary on their designated locations.
Select start and end times: Set a
 timeframe for each summary by clicking on the start and end time pickers for each summary.
Mind the active summaries: Only one summary can be active at a time; new entries replace the previous ones.
Note
Only designated roles can add, edit, or delete.
Adding and editing awareness comments
Open the editor: Click on the
editing icon on the header of the awareness comments widget card.Choose your action: Depending on your permissions, you will be able to:
Add a new comment.
- Edit or
 delete comments you authored.
Select a tag: Choose a tag to identify your comment: general, performance, or safety.
Set a timeframe: Set the
Show until time picker, to automatically delete the comment at the chosen time.
Note
Only designated roles can add, edit, or delete comments.
Using the real-time widget
Select operational mode (Tags): From the dropdown menu, choose a tag that matches the current rig activity. Each tag automatically groups the most relevant sensors for that operation, streamlining your view.
Add sensors: Click the
 edit tags icon to open the sensor list. Use the checkboxes to select the sensors you want to monitor. Each selected sensor will appear as a Real-Time Card, displaying live values, performance metrics, and trends.
Customize the view: Use the
 options button to toggle trendlines on/off, and expand cards for detailed metrics.
Note
Some cards may appear empty if no data is available. Make sure you've selected the correct tag based on the current rig activity.
Using the general information widget
Select a section: Scroll and select the section you want to open:
 Insights – shows events and linked plans from the last 24h.
 Unperformed preparations – lists pending setup tasks.
 Actions completed – shows a breakdown of finished actions.
- Upcoming Milestones – displays plan or well changes.
View details: Click on the desired section, and it will open a modal window where you can expand entries for more detail.
Configuring my shortcuts
Open the editor: Click the
 edit my shortcuts icon in the My Shortcuts widget.
Select shortcuts: To select the shortcuts, check the boxes from the list of available integrations and tools.
Save changes: Click on the Edit button to save the changes. Shortcuts are personal and saved per user.
Tips and tricks
Use
show until on the awareness comments to avoid outdated notices from lingering.For a better overview on both large and small screens, the widgets will automatically adjust.
Troubleshooting
Missing widgets: You might not have access, or the integration isn’t enabled.
Cannot edit comments: You must be the original author and have the correct permissions.
Widget overlap or misalignment: Too many widgets may trigger a compressed layout, scroll to view, or reduce the widget count.
Need to configure access levels: Administrators can set who has permission to update RigPage content, depending on the server setup:
On a cloud server - Access levels can be configured directly in SysConfig.
On a local server - Access changes must go through the support team.