Export to IDS
The IDS Export feature in RigFlow enables users to automatically transfer operational log data into the IDS reporting system. It helps streamline reporting by reducing double work—what was previously updated manually on both platforms can now be managed directly in RigFlow and exported in a compatible format for IDS.
How it looks
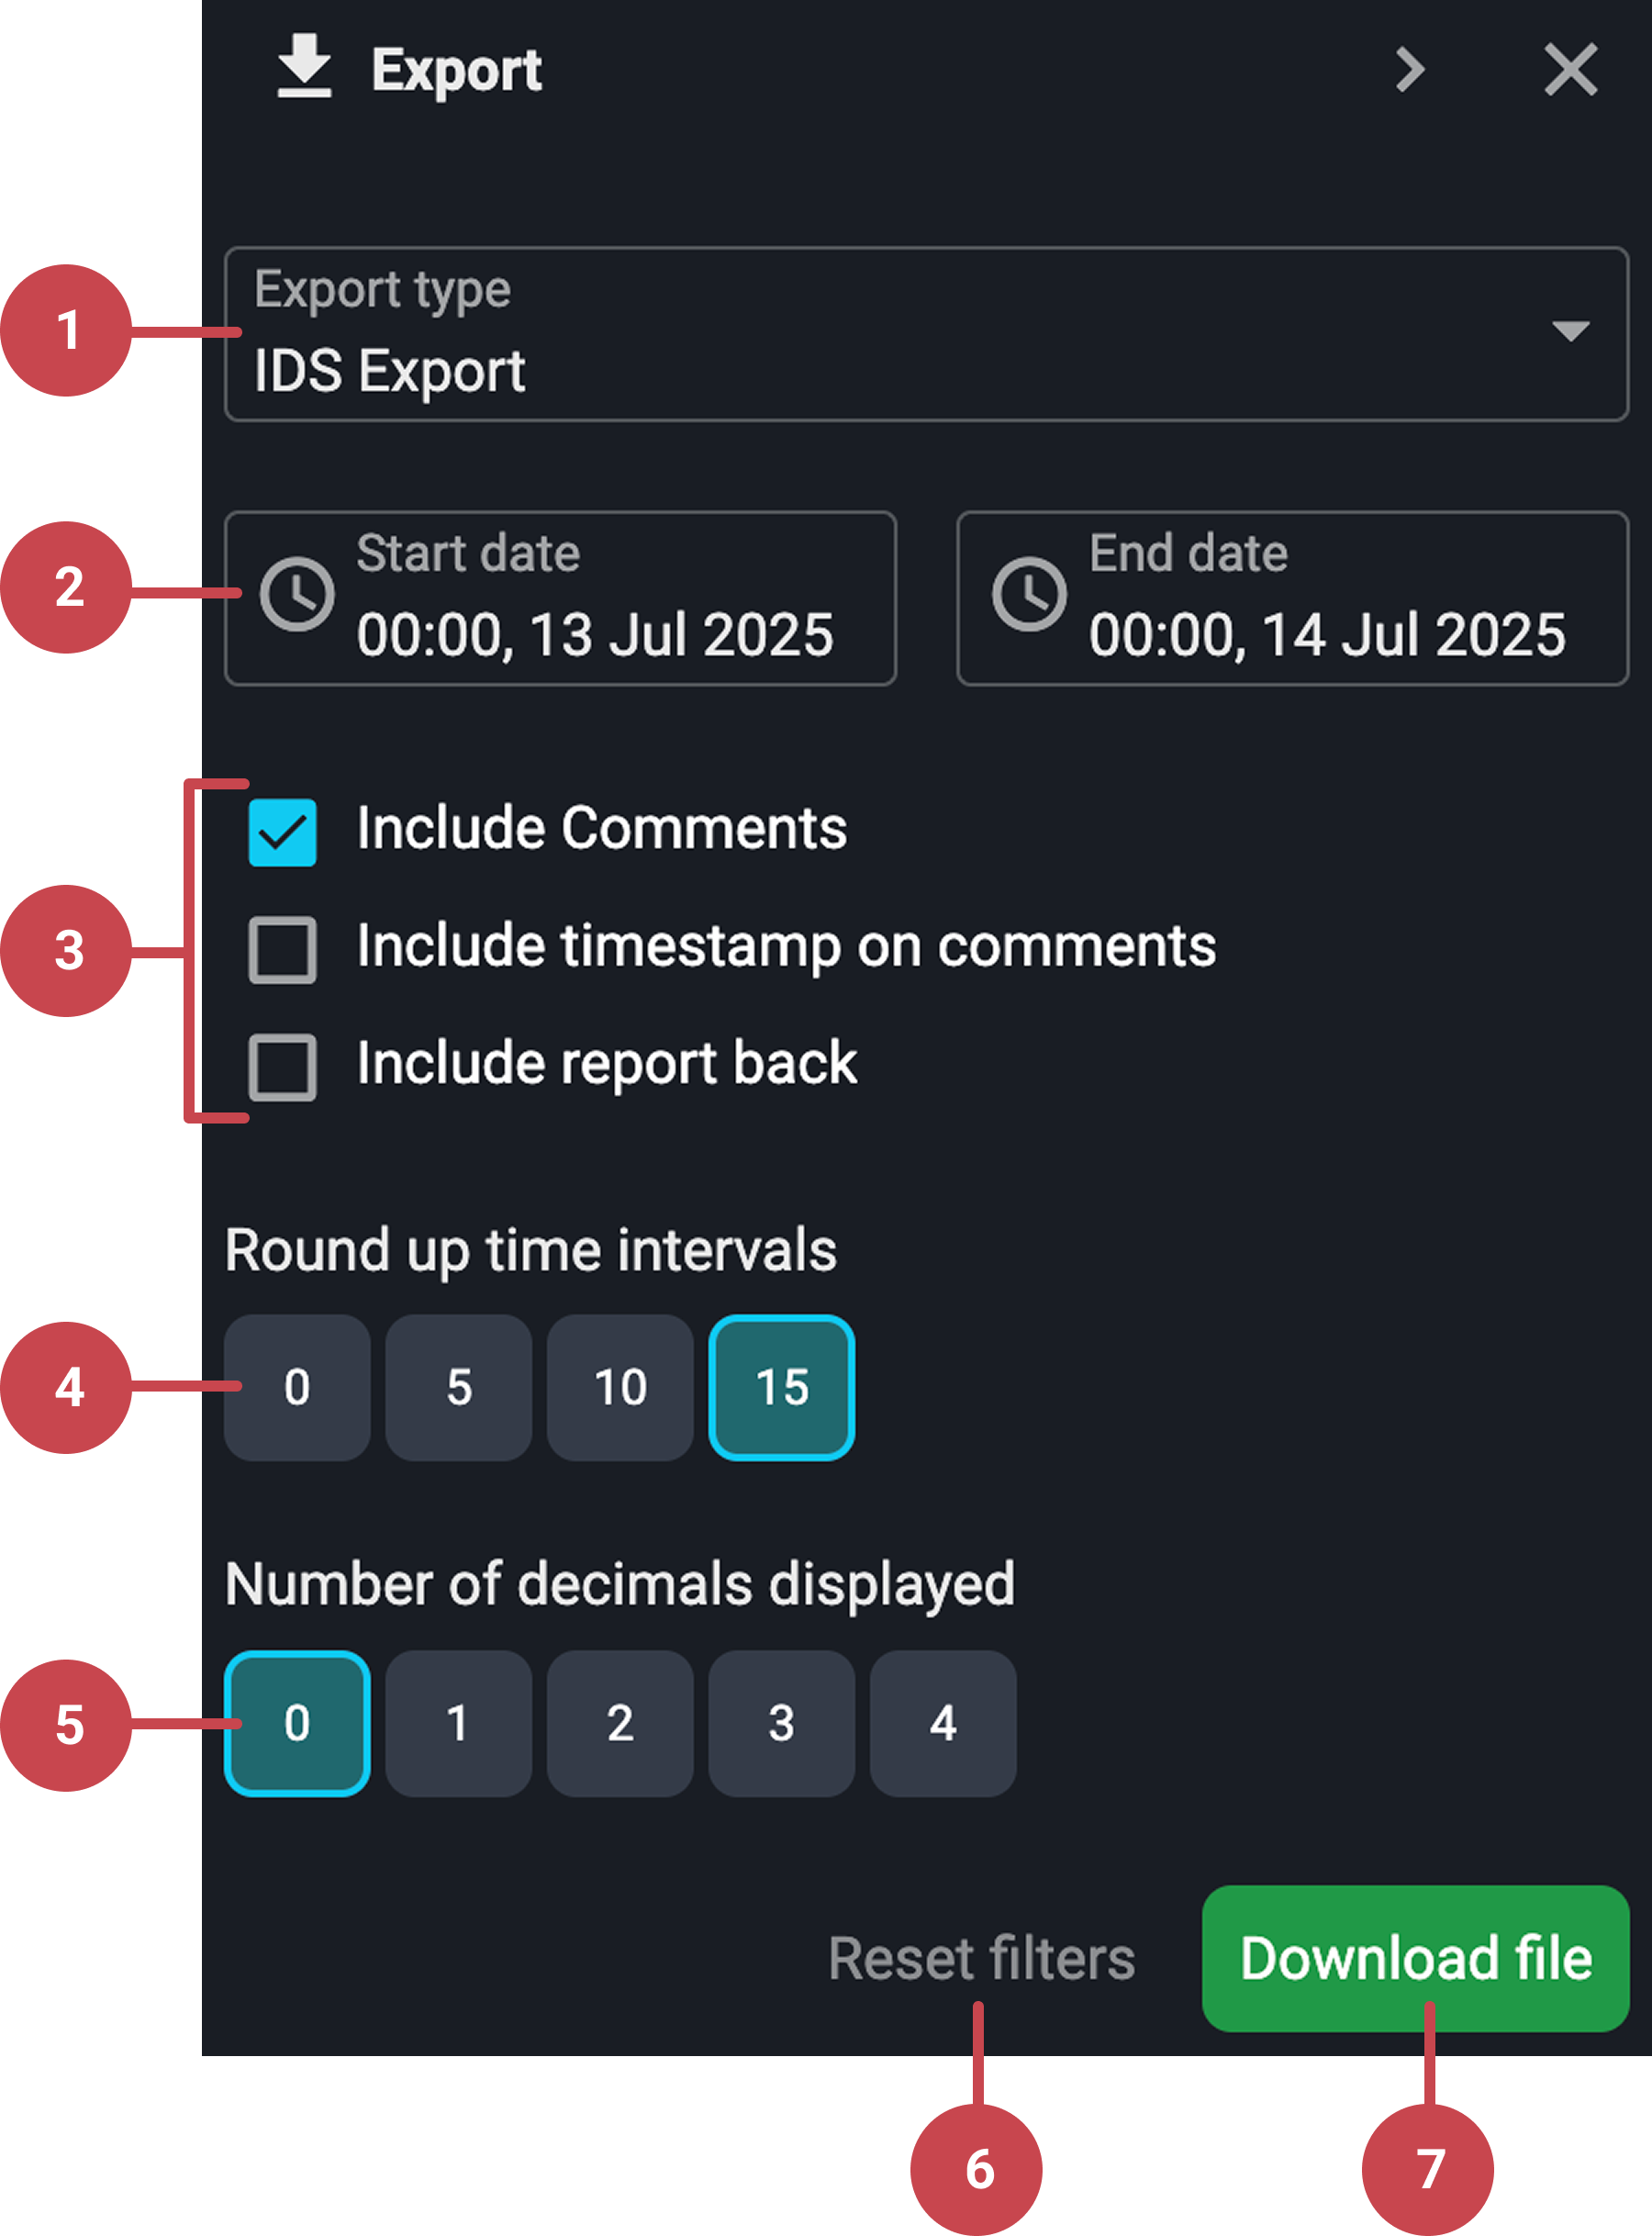
The IDS Export interface in RigFlow is intuitive and divided into several clear components. Here’s a walkthrough of what each element does:
Export type picker: This is the first dropdown menu at the top of the Export panel. It includes the IDS Export option, used when reporting to IDS systems.
Important
Always ensure IDS Export is selected for correct formatting.
Time frame picker (start and end time): This section controls the period for which the operational log will be exported. Consists of two parts:
Start time and date (left side).
End time and date (right side).
Note
Default setting typically covers the previous 24-hour period.
Export content settings: Choose which optional information should be included in the exported report:
Include comments: Adds operational comments.
Include timestamp on comments: Displays the time each entry occurred.
Include report back: Inserts report-back entries from work steps.
Checkboxes are toggled on or off with a click.
Round up time intervals: Used to set how time is rounded in the export. For IDS, 15 minutes is the default setting, but you can choose between 0, 5, 10, or 15 minutes. The selected interval is highlighted with a different color.
Number of decimals displayed: Controls numeric precision by choosing based on reporting requirements. The default setting is 0 decimals (standard for IDS reporting), but you can choose between 0, 1, 2, 3, or 4 decimals. Your selection changes color when active.
Reset filters button: Useful for quickly restoring standard IDS export parameters. It becomes active once you've changed any settings from the defaults:
Include comments.
Time Interval to 15 minutes.
Decimal Places to 0.
Export content button: A green button labeled Export Content starts the report generation. After clicking, the system compiles the selected data into an Excel file. Once done, a
 Download File button will appear below the Export content button.
Note
If you refresh the page before downloading, the export must be generated again.
Step-by-step instructions
Export the operational log
Open the export panel: Go to the Right sidebar and click on the
Export icon.Set the IDS Export: On the Export type picker, look for IDS Export and select it.
Choose a time range: Set the date and time range for export by clicking on the start and end time pickers.
Select the optional settings:
Include comments, timestamps, and report backs.
Set round-up intervals (15 minutes default).
Select the number of decimals displayed (0 decimals by default).
Generate and save the report
Generate the report: Click the download file it will generate an Excel file.
Upload to IDS: Open the Excel file for review or manual editing before uploading to IDS.
Examples
Operation: “Make up 12¼” BHA”
Assigned Codes: Programmed Event → Drilling → Tripping
Export Result: A 24-hour Excel report with all steps, class/time codes, duration, comments, and report backs.
Tips and tricks
Re-Exporting: If the file wasn’t saved, go back to RigFlow, select the same date range, and export again. No need to re-enter codes.
Filter reset: Use Reset Filters to revert to the default settings.
Quick day navigation: In the time frame picker of the IDS Export panel, use the left and right arrows on your keyboard to quickly move backward or forward entry by entry.
Favorite time codes: Use the star icon next to frequently used time codes to add them to your favorites list. This reduces the time spent searching during each export.