RigPulse
 RigPulse is a tool designed to simplify and centralize reporting for drilling operations, including daily report and IADC, downtime module, monthly rig rate summary, and personnel on board. It’s aimed at everyone who contributes to or approves a Daily Drilling Report (DDR), from rig crew members to onshore supervisors. RigPulse streamlines the workflow by integrating directly with RigFlow and RigBridge, eliminating the need for separate tools or manual data transfers.
How it looks
RigPulse is structured into three main pages: the Report Overview Page, the RigPulse Page, and the Report Detail Page. Each page is tailored for a specific part of the reporting workflow and has clear components designed for ease of use.
RigPulse page
After selecting a rig from the overview, you’ll land on this page, which provides a monthly summary of all Daily Drilling Reports (DDRs) for that specific rig. If you are accessing RigPulse via RigFlow, this is the first page you’ll see.
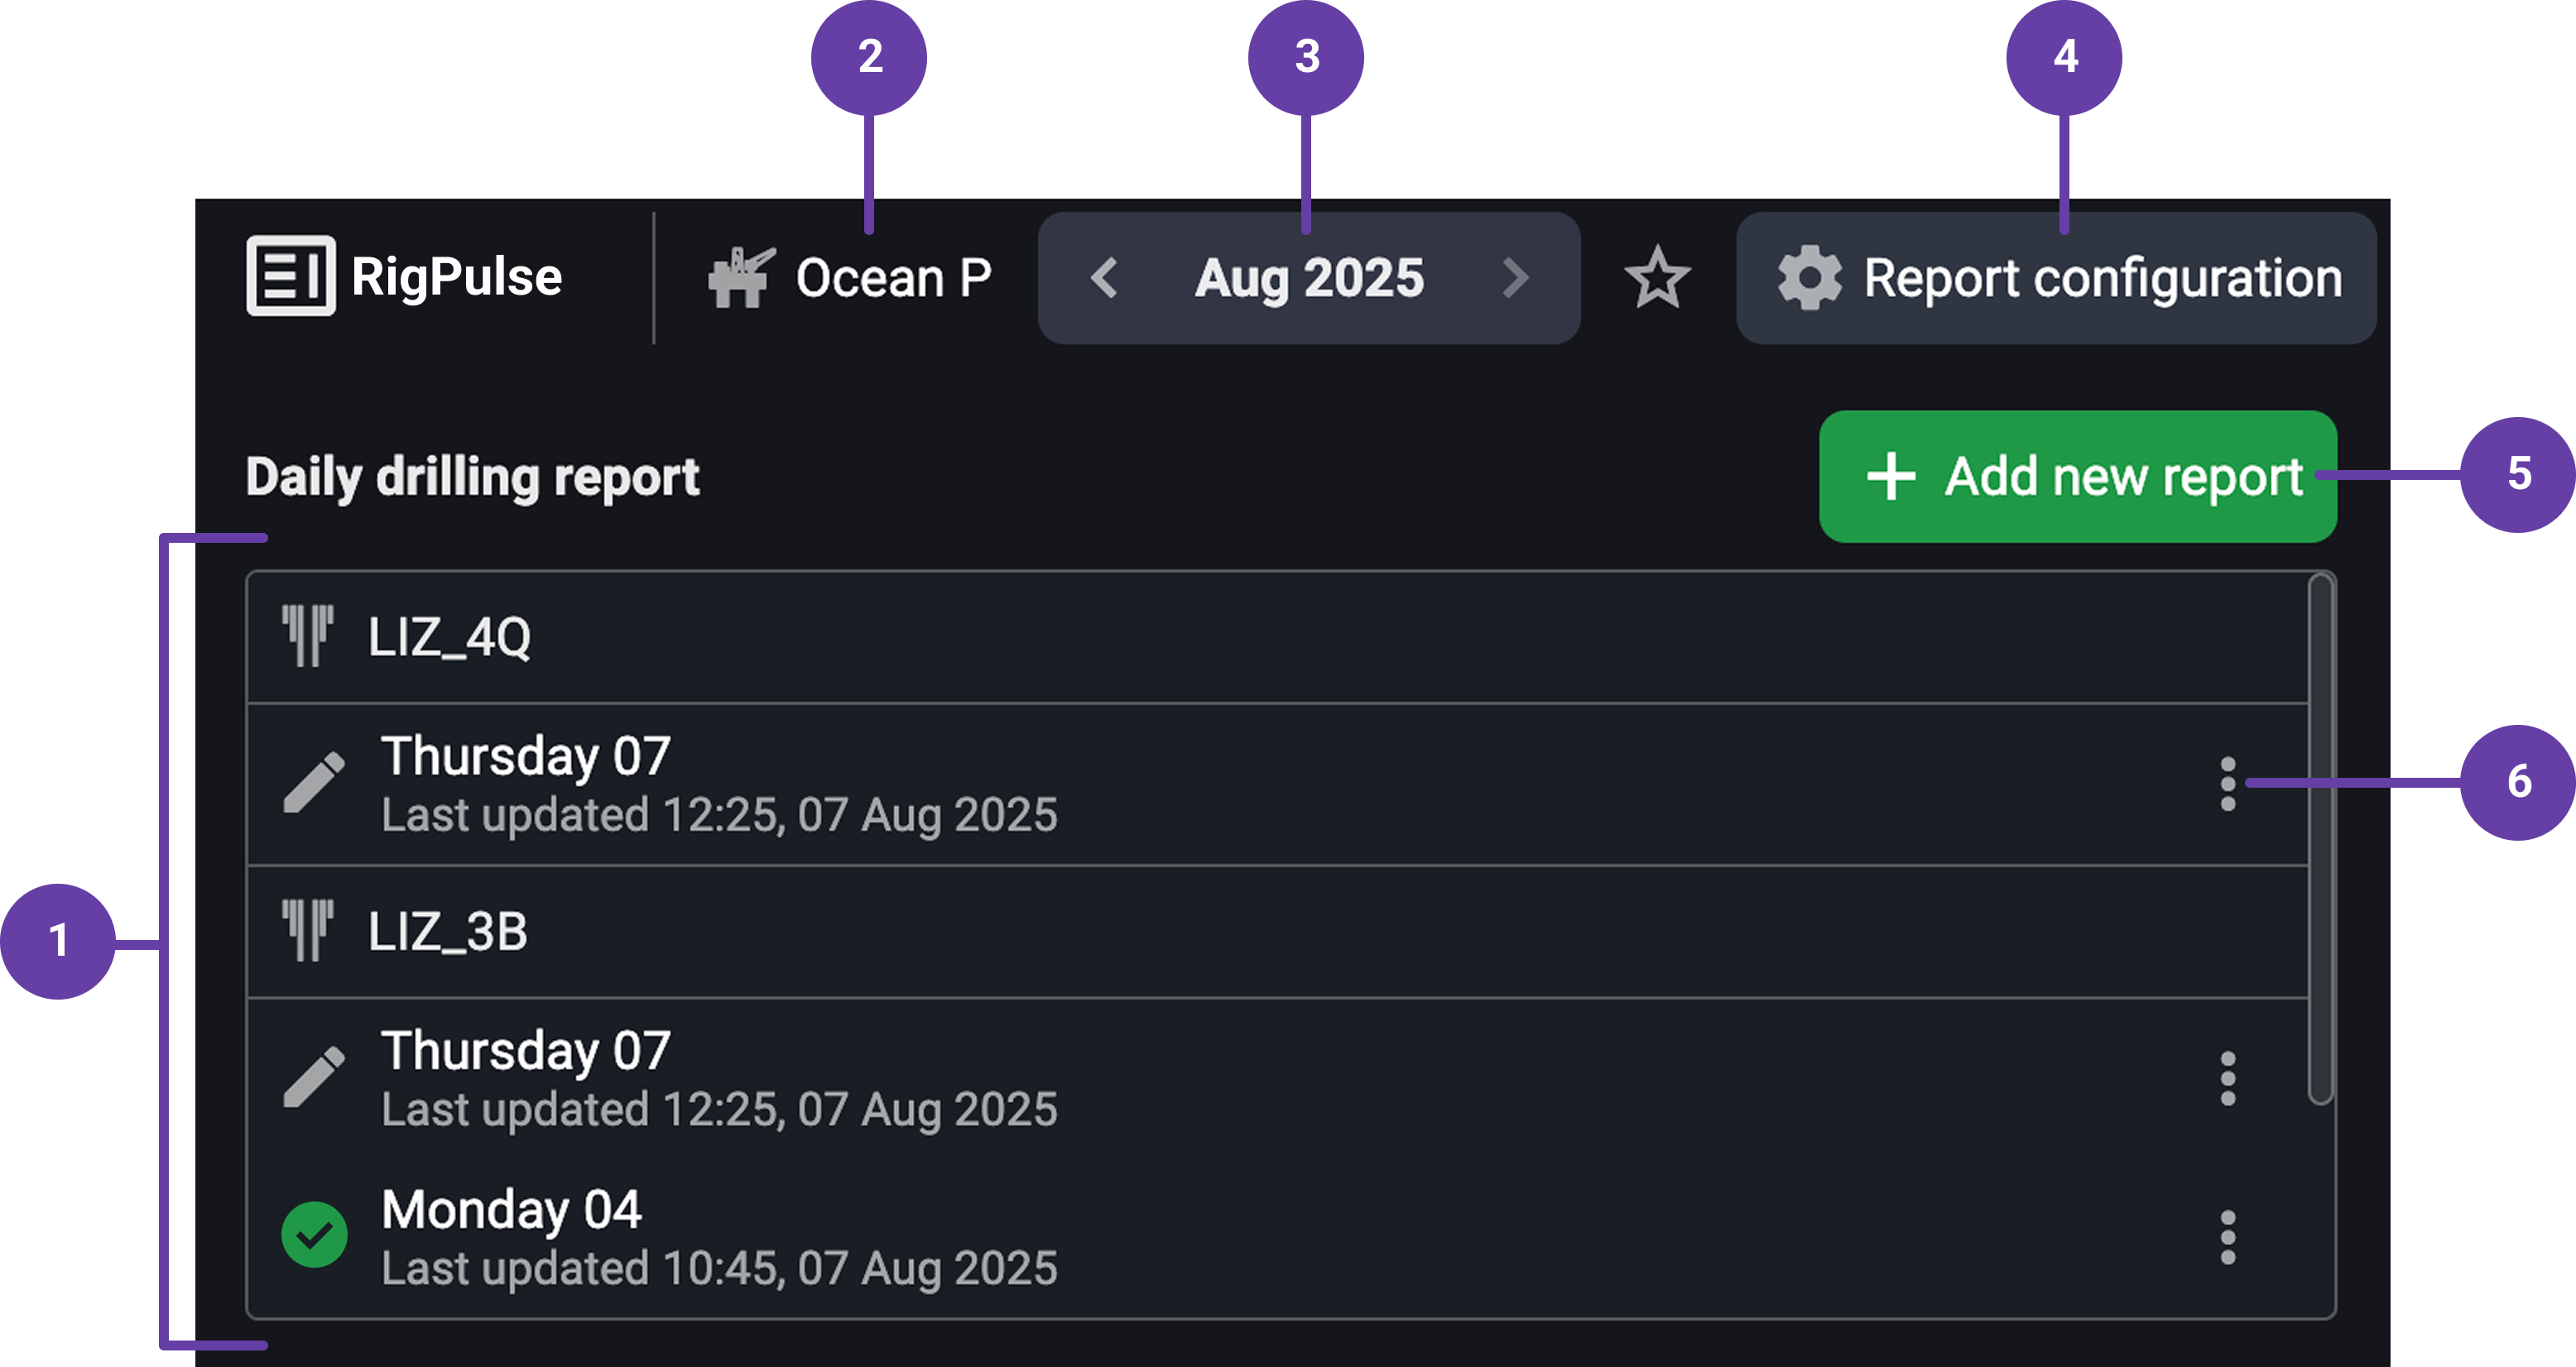
Daily Drilling Report list: This section displays a chronological list of reports for the selected month, grouped by well. Each entry on the list displays a status icon, a responsible person tag, and a timestamp showing the last update. You can click any entry to open and view the full report.
Breadcrumb header: This header displays the rig name and includes a breadcrumb trail that lets you easily navigate back to the Report Overview page with a single click.
Month picker: By default, this is set to the current month. You can use it to quickly switch between months.
 Report configuration panel (Admins): It allows for defining essential data for each rig’s reports, such as well information, rig contract, and units of measure. This setup is required before reports can be approved.
 Add new report: Clicking this button opens a modal where you can create a new daily report. Once submitted, the report opens automatically for editing.
 Menu: Clicking the menu icon gives you additional options. You can download the report as a PDF, and if you have the necessary permissions, delete the report.
Report details page
This is the main workspace for filling out and reviewing the daily report. It has multiple sections and restricted edit access based on roles.
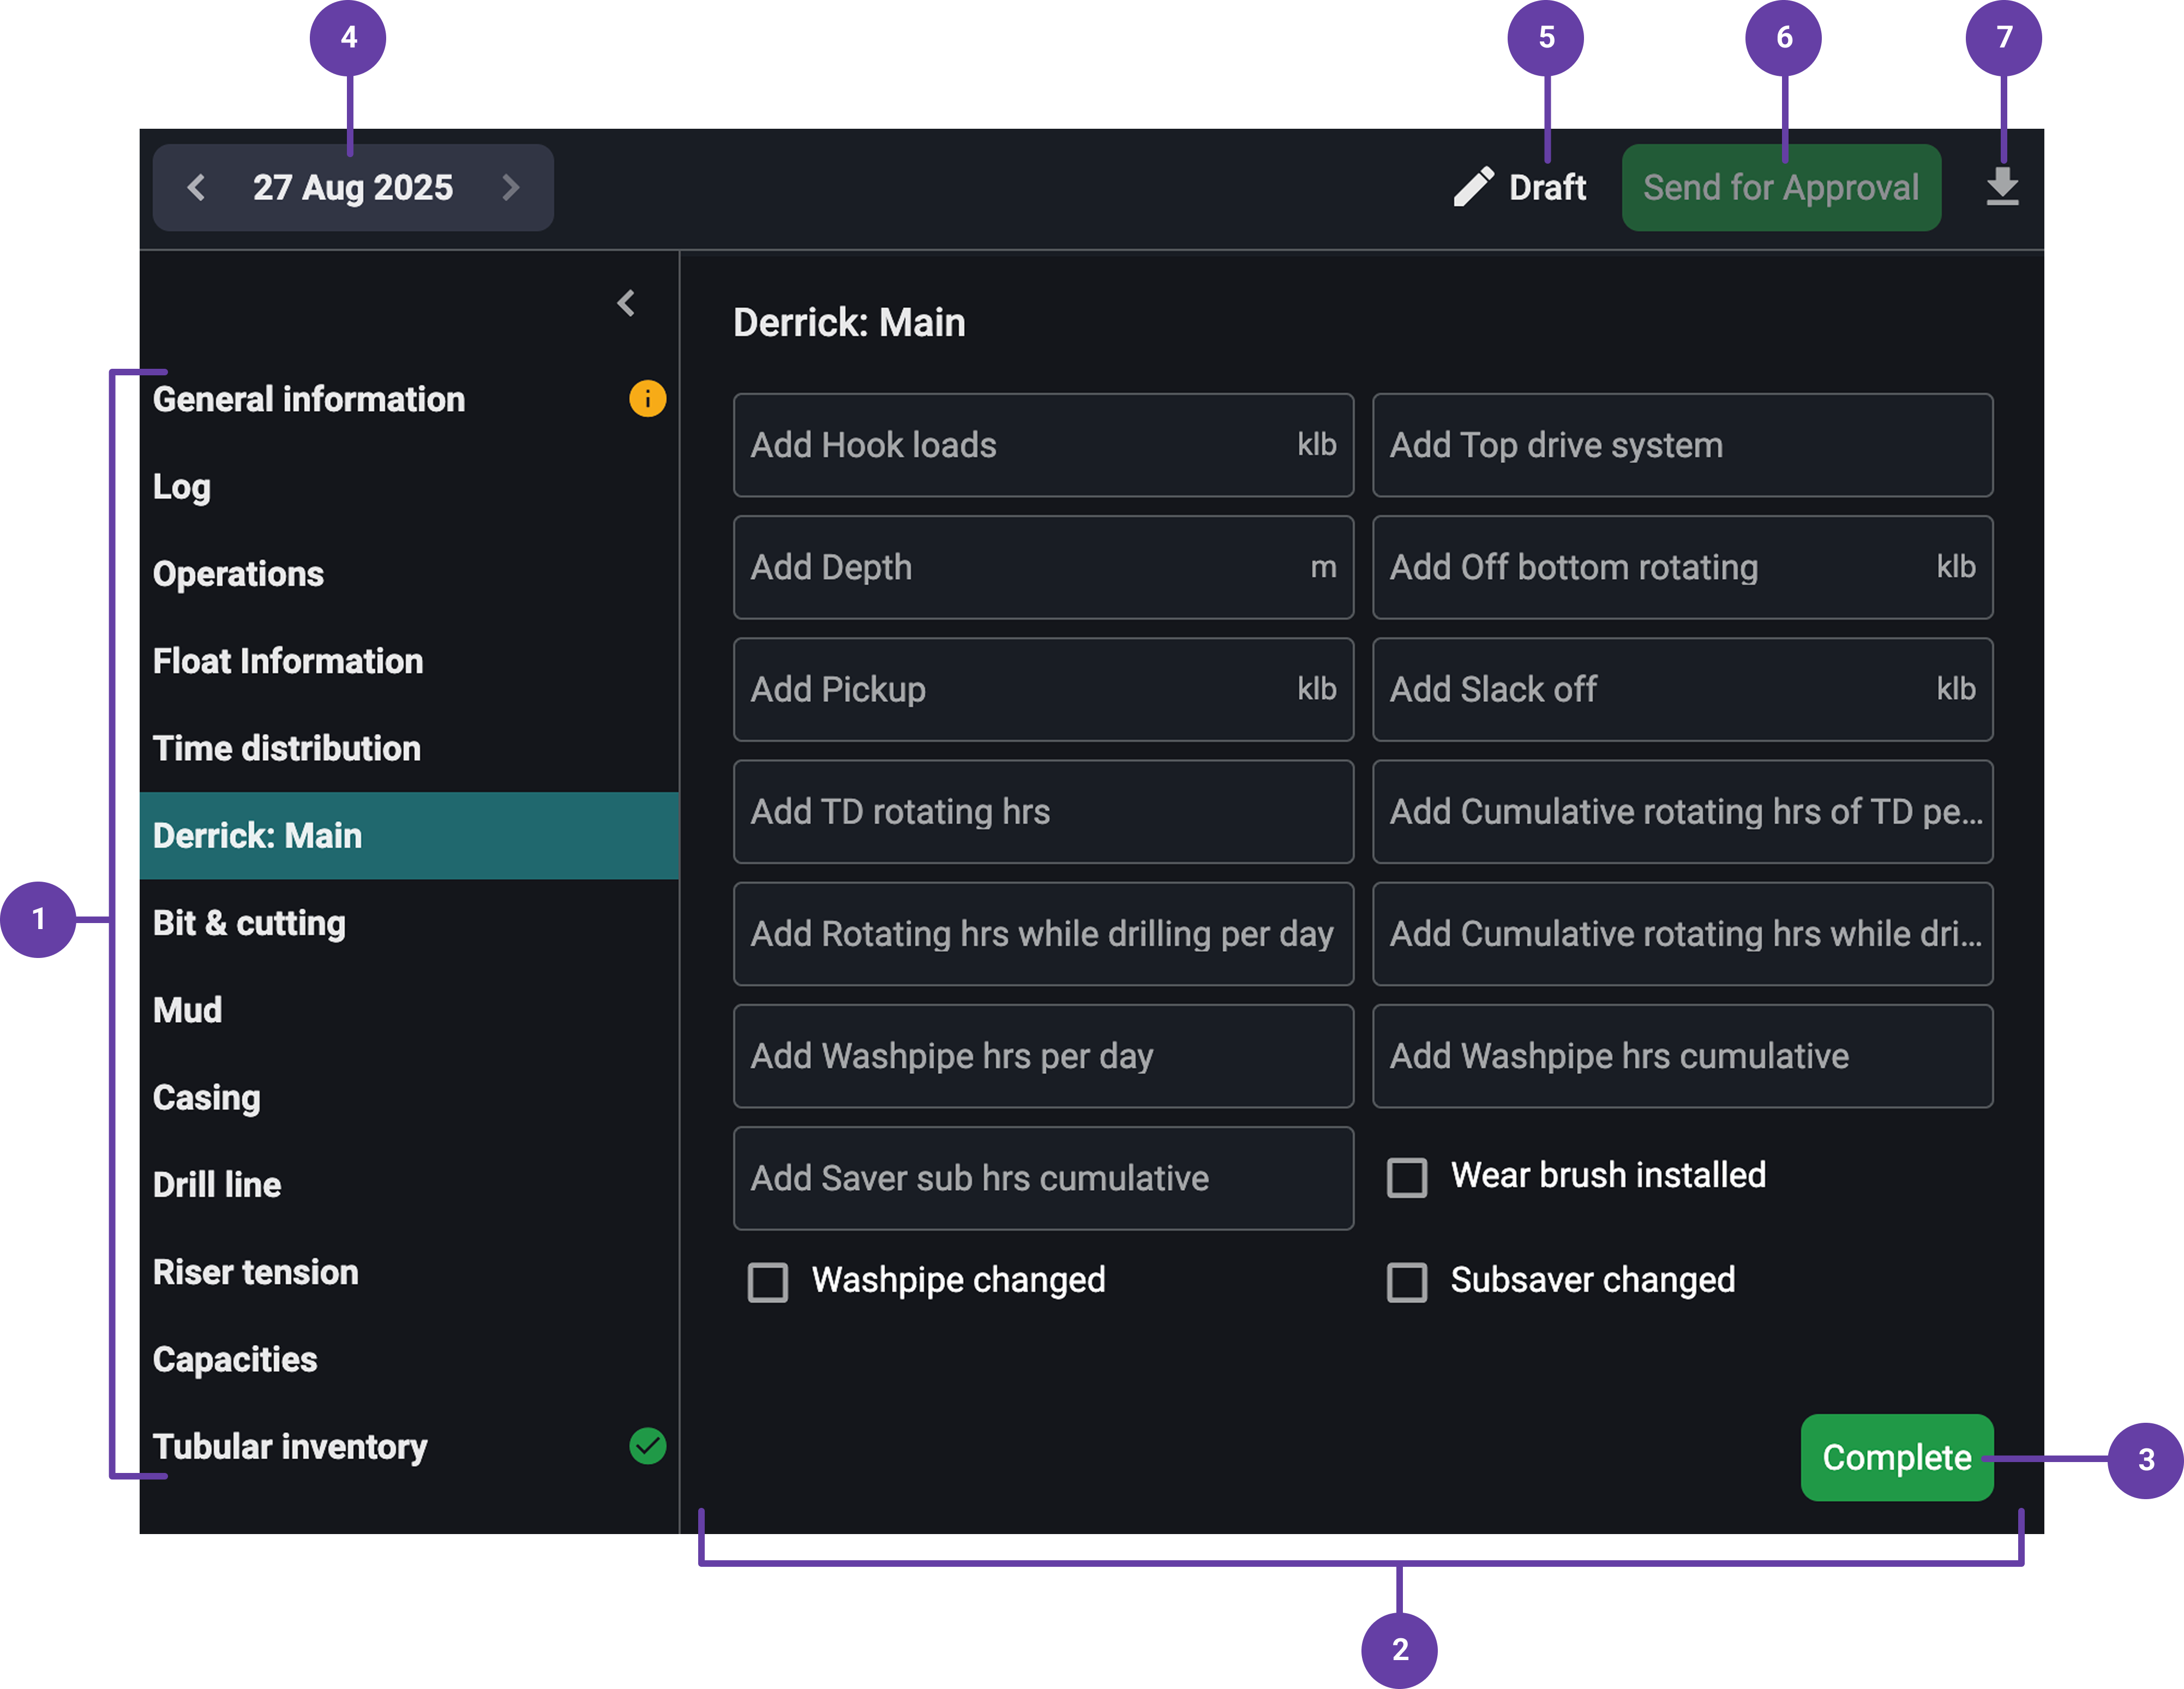
Sidebar with sections: This sidebar lists all the sections that make up the daily report. Clicking on a section takes you directly to that part of the report.
Each section includes a visual status indicator:
No icon - Section has not been completed.
 Completed tag - Section has been marked as completed.
 Alert icon - Section is missing mandatory information.
Editable sections: You can only edit sections that are assigned to your role. If a section isn’t assigned to you, it will appear grayed out and cannot be changed. However, you can still view the entire report, regardless of your edit permissions.
Complete section button: At the bottom of each editable section, there’s a Complete button. Clicking it locks the section and marks it as finished. If you’re not assigned to that section, the button will be grayed out and disabled. You can later unlock a completed section using the
menu if changes are needed.Date pickers: Located at the top of the report, these allow you to quickly move between days so you can view or edit reports.
Report status indicator: This visual element shows the current state of the report. It also includes a revision label to indicate which version of the report you're viewing.
Approval controls (For users with permissions): When all sections are completed, a user with the right permissions will see a Send for Approval button. Clicking it opens a dialog where you select approver roles, choose users from a dropdown, and optionally add a comment. Once submitted, the approvers are notified via email and in-app alerts.
 Donwload button: Lets you download the current report as a PDF at any time, regardless of its status.
Step-by-step instructions
Navigate RigPulse
Access the Report overview: From the Left sidebar, open the Report overview. This page displays all the rigs in your fleet as cards, each summarizing report activity for that rig.
Open the RigPulse page: Find the rig you want to work with. Click the Open button on the rig card to access its RigPulse page. Alternatively, click the
 dropdown arrow to go directly to today’s or yesterday’s report, or to access the report configuration.
Navigate the RigPulse page: Once inside, you’ll see a list of daily drilling reports for the selected month. You can use the month picker at the top to switch between months and view past reports.
Open the report detail page: Click on any report entry in the list to open its full detail page, where you can view or edit content depending on your role.
Create a new Daily Drilling Report: You can also create a new report by clicking the
Add new report button. After completing the setup (selecting date, well, and type), the new report will open immediately in detail view for editing.
Fill in the report
Open a report: Select and click on the report you want to edit to open it. You can also add a new report if needed.
Locate the entries you need to fill in: Use the Left sidebar to navigate through the report sections. You can also scroll directly through the full report content in the main panel to find the editable areas.
Fill in the report: You can only enter data in sections assigned to your role. Grayed-out sections can only be viewed, and not edited.
Complete your assigned fields: Once you've filled out your assigned sections, click the Complete button at the bottom of each one. This locks the section and marks it as finished.
Note
If a section is missing required data, you’ll see an
 alert icon, and the report can't be submitted for approval until it's resolved.
Edit if needed: If you need to make changes after marking a section as complete, click the
menu next to the section and select the option to unlock it.
Submit for approval
Click the send for approval button: Once all contributors have completed their assigned sections, users with the right permission will see a Send for Approval button appear at the top of the report.
Select role: After clicking the button, a modal opens where you must choose the required approval roles. These roles are predefined in the system configuration, and once selected, a dropdown list will appear showing the specific individuals assigned to those roles.
Add a comment (Optional): Below the approver selection, you’ll find a text box where you can type any optional comments related to the report before submitting it for approval.
Send for approval: Click the Send button. The approvers will receive a notification in the system and an email alert to review and approve the report. The report’s status will then update accordingly.
Approve the report
Review the approval notifications: Once a report is sent for approval, approvers will receive an in-system notification as well as an email alert. Both notifications include a direct link to the report that requires their review.
Access the report: Approvers can click the Open Daily Drilling Report button in the email or notification. This takes them directly to the report's approval interface, where they can see its content and approval status.
Approve the report: At the top of the report, the approver will see a status bar showing the approval roles involved and their current state. An Approve button will be available for authorized users to finalize the approval.
Share report: Once approved, the report is automatically sent to a distribution list configured in the system for that specific rig. Users on the list receive the report link via email. Additionally, the report can be exported as a PDF or viewed online in its final format.
Reopen for editing: If changes are needed after approval, an authorized user can click Unlock for Edit at the top of the report. This action reopens the report for modifications, but it also resets the approval process, requiring the report to be resubmitted and reapproved.
Use Report configuration (Admins)
Access the Report configuration panel: From the Report overview page, locate the rig card you're working with. Click the
dropdown arrow next to the Open button, then select Report configuration. Alternatively, if you're already on the RigPulse page, you can access the same panel by clicking the Report configuration button located in the page header. Both of these options are only visible to users with admin access.Set the necessary configurations: Inside the
Report configuration, you can manage key setup data for that rig’s reports. This includes wells, rig contracts, and units of measure.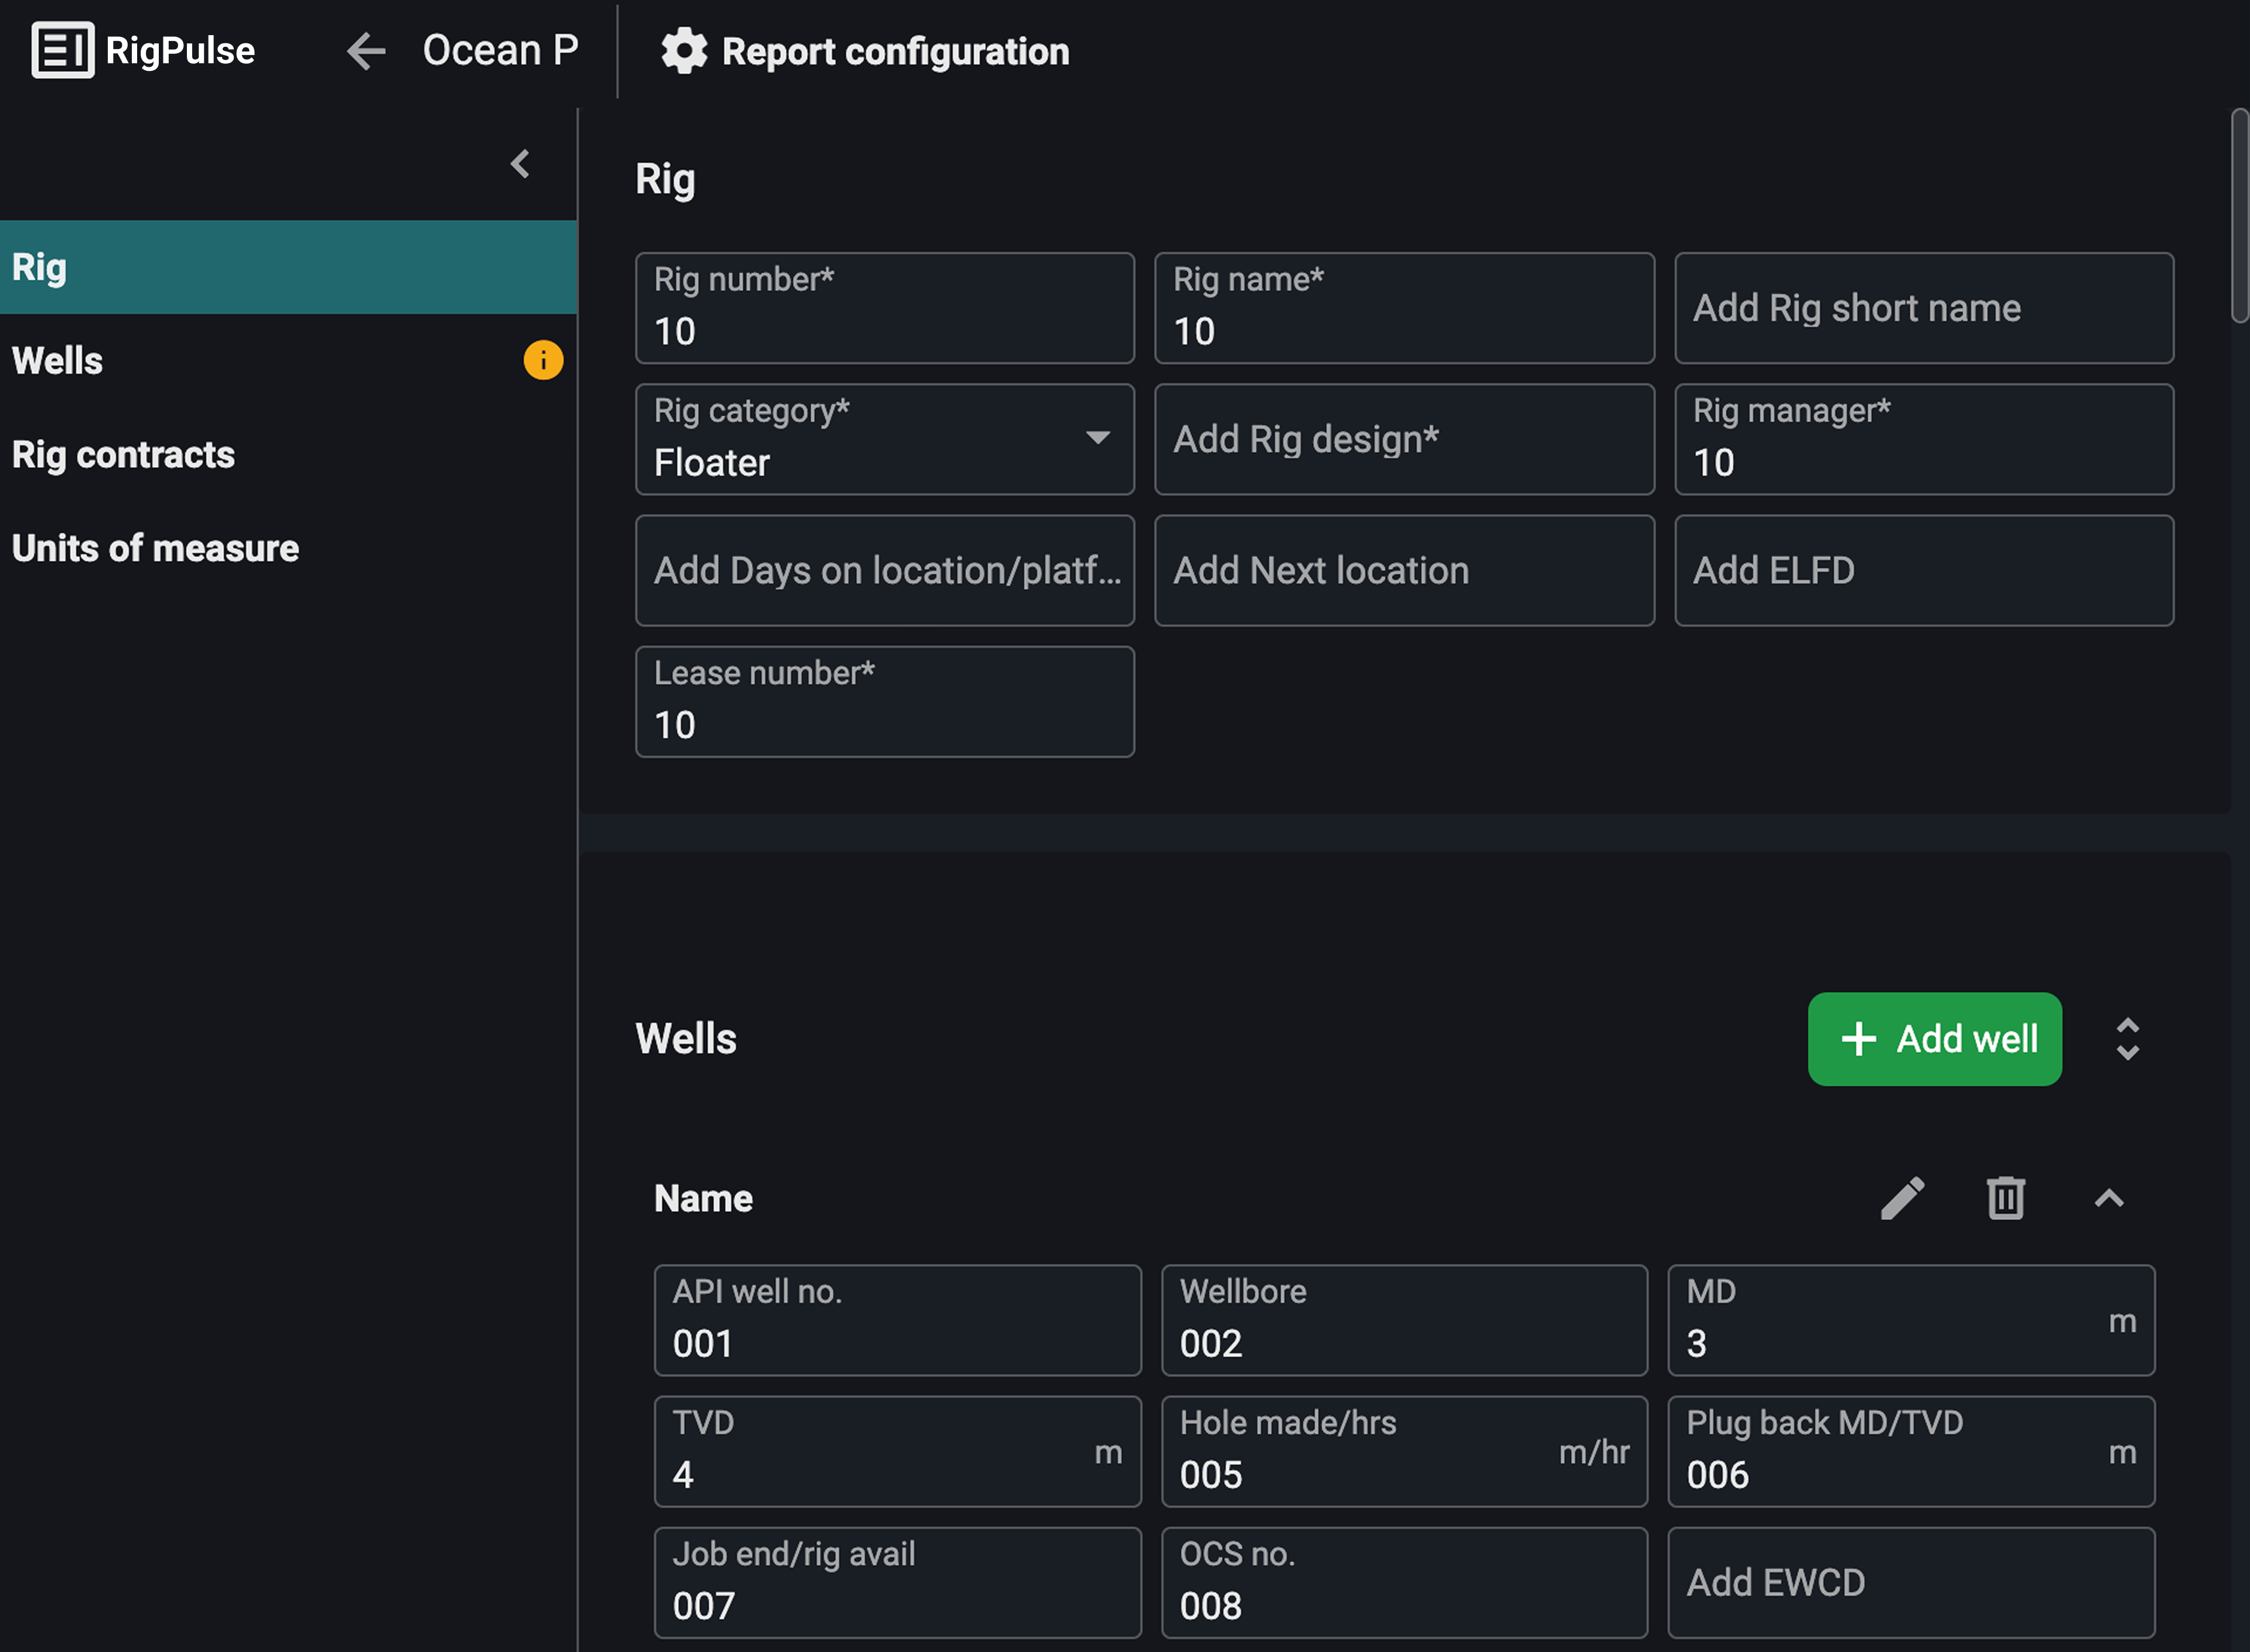
Add, edit, or delete wells: To add a well, click the
Add Well button and fill in the required information. To edit or delete a well, navigate to the wells header and click the  edit or
  delete icon.
Note
If a user has added a custom well from within a report, it will appear in this panel, allowing admins to either complete the missing data or remove it.
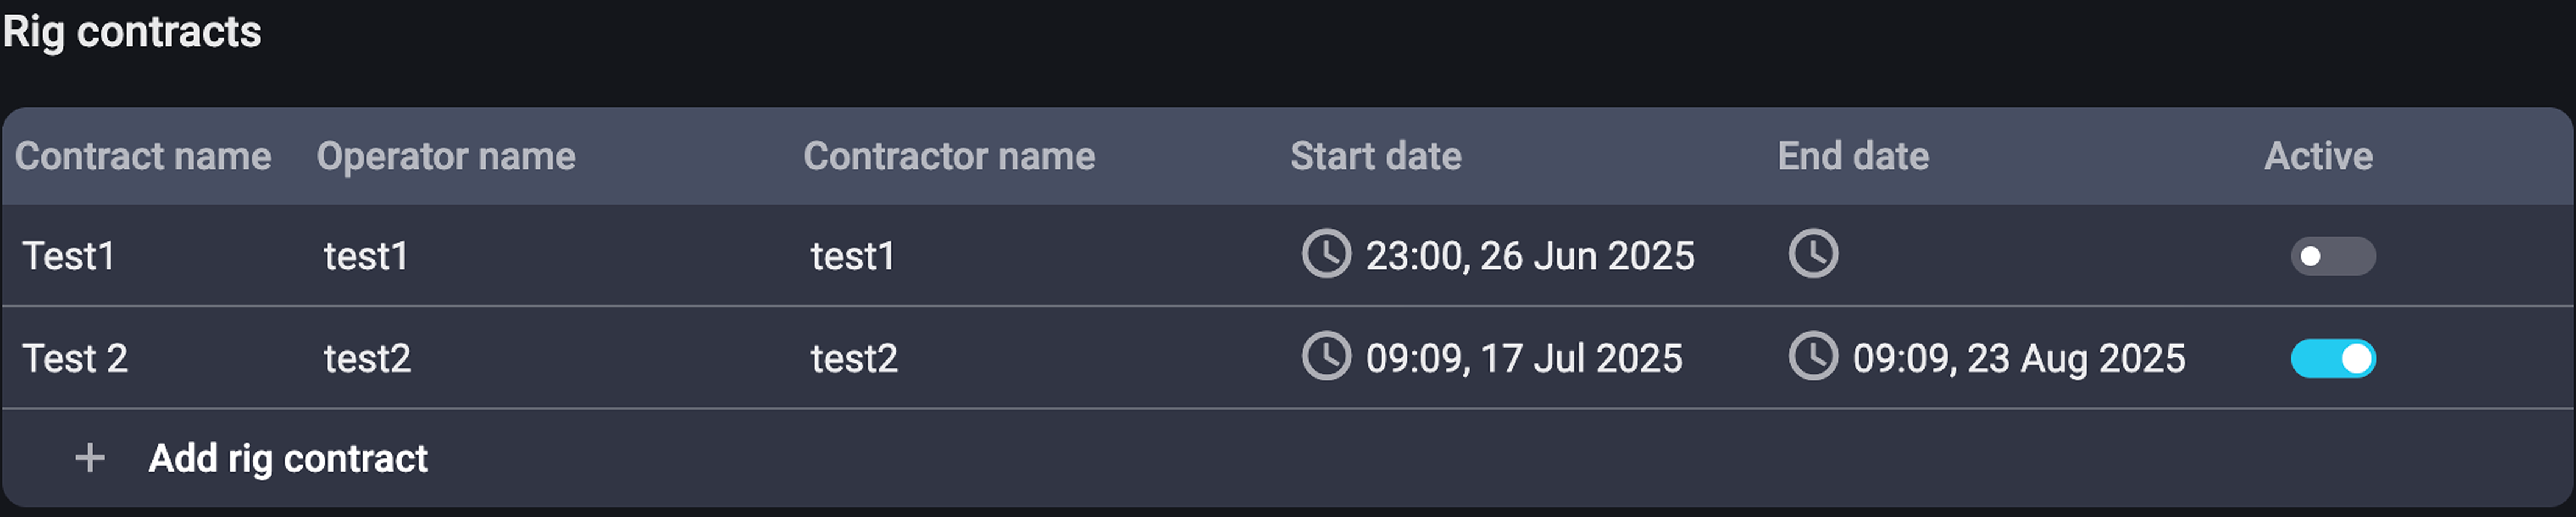
Define the rig contract for the report: You must have at least one active rig contract configured. Admins can add or remove contracts as needed, but RigPulse will not allow deletion of the last remaining contract, ensuring a contract is always assigned.
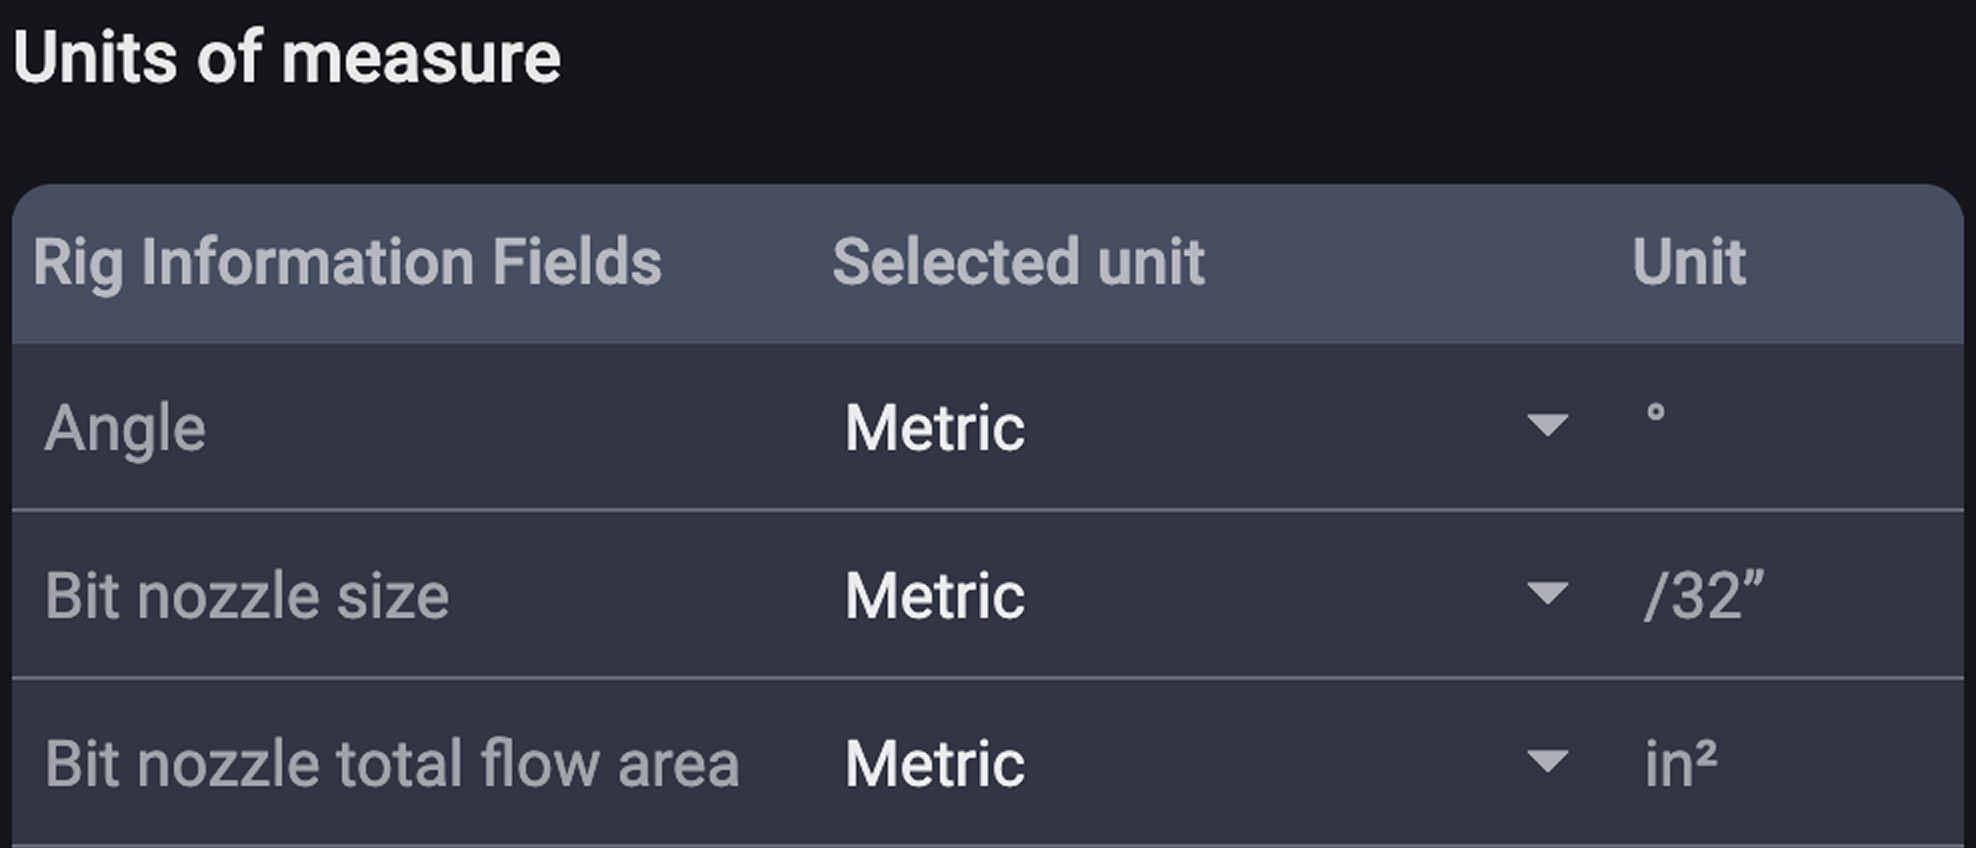
Choose a unit of measure: Choose between Metric or API units for values like water depth. This setting affects new reports only, already approved reports remain unchanged.
Save the changes: Once your configurations are set, the system will automatically use this information to auto-fill in newly created reports, such as rig info, well selection, and measurement units.
Important
Reports cannot be sent for approval unless these required elements are defined.
Examples
A Driller enters mud data in their assigned section, marks it as complete, and logs off.
The Rig Manager reviews all completed sections and submits the DDR for approval.
The OIM receives a notification and approves the report with a click.
Tips and tricks
Use the
 Favorites toggle in the overview to quickly access rigs you manage.
The report view will carry forward data from the previous day to save time.
Use the
menu to unlock sections if changes are needed after marking as complete.
Troubleshooting
Can’t approve report: Check that all mandatory fields are filled in and all sections are marked as complete.
No data to enter in a section: If a section doesn’t require any input, you still need to click the Complete button. This confirms that the section was intentionally left blank, allowing the report to be submitted for approval.
Report won’t show up: Ensure you selected the correct rig and month.
Custom well not saving: Only specific roles can finalize custom wells in the report config.