Export to Open Wells
The Open Wells Export feature in RigFlow allows operators and contractors to seamlessly export operational data from RigFlow into the Open Wells reporting system, eliminating the need for manual re-entry and reducing the risk of human error.
How it looks
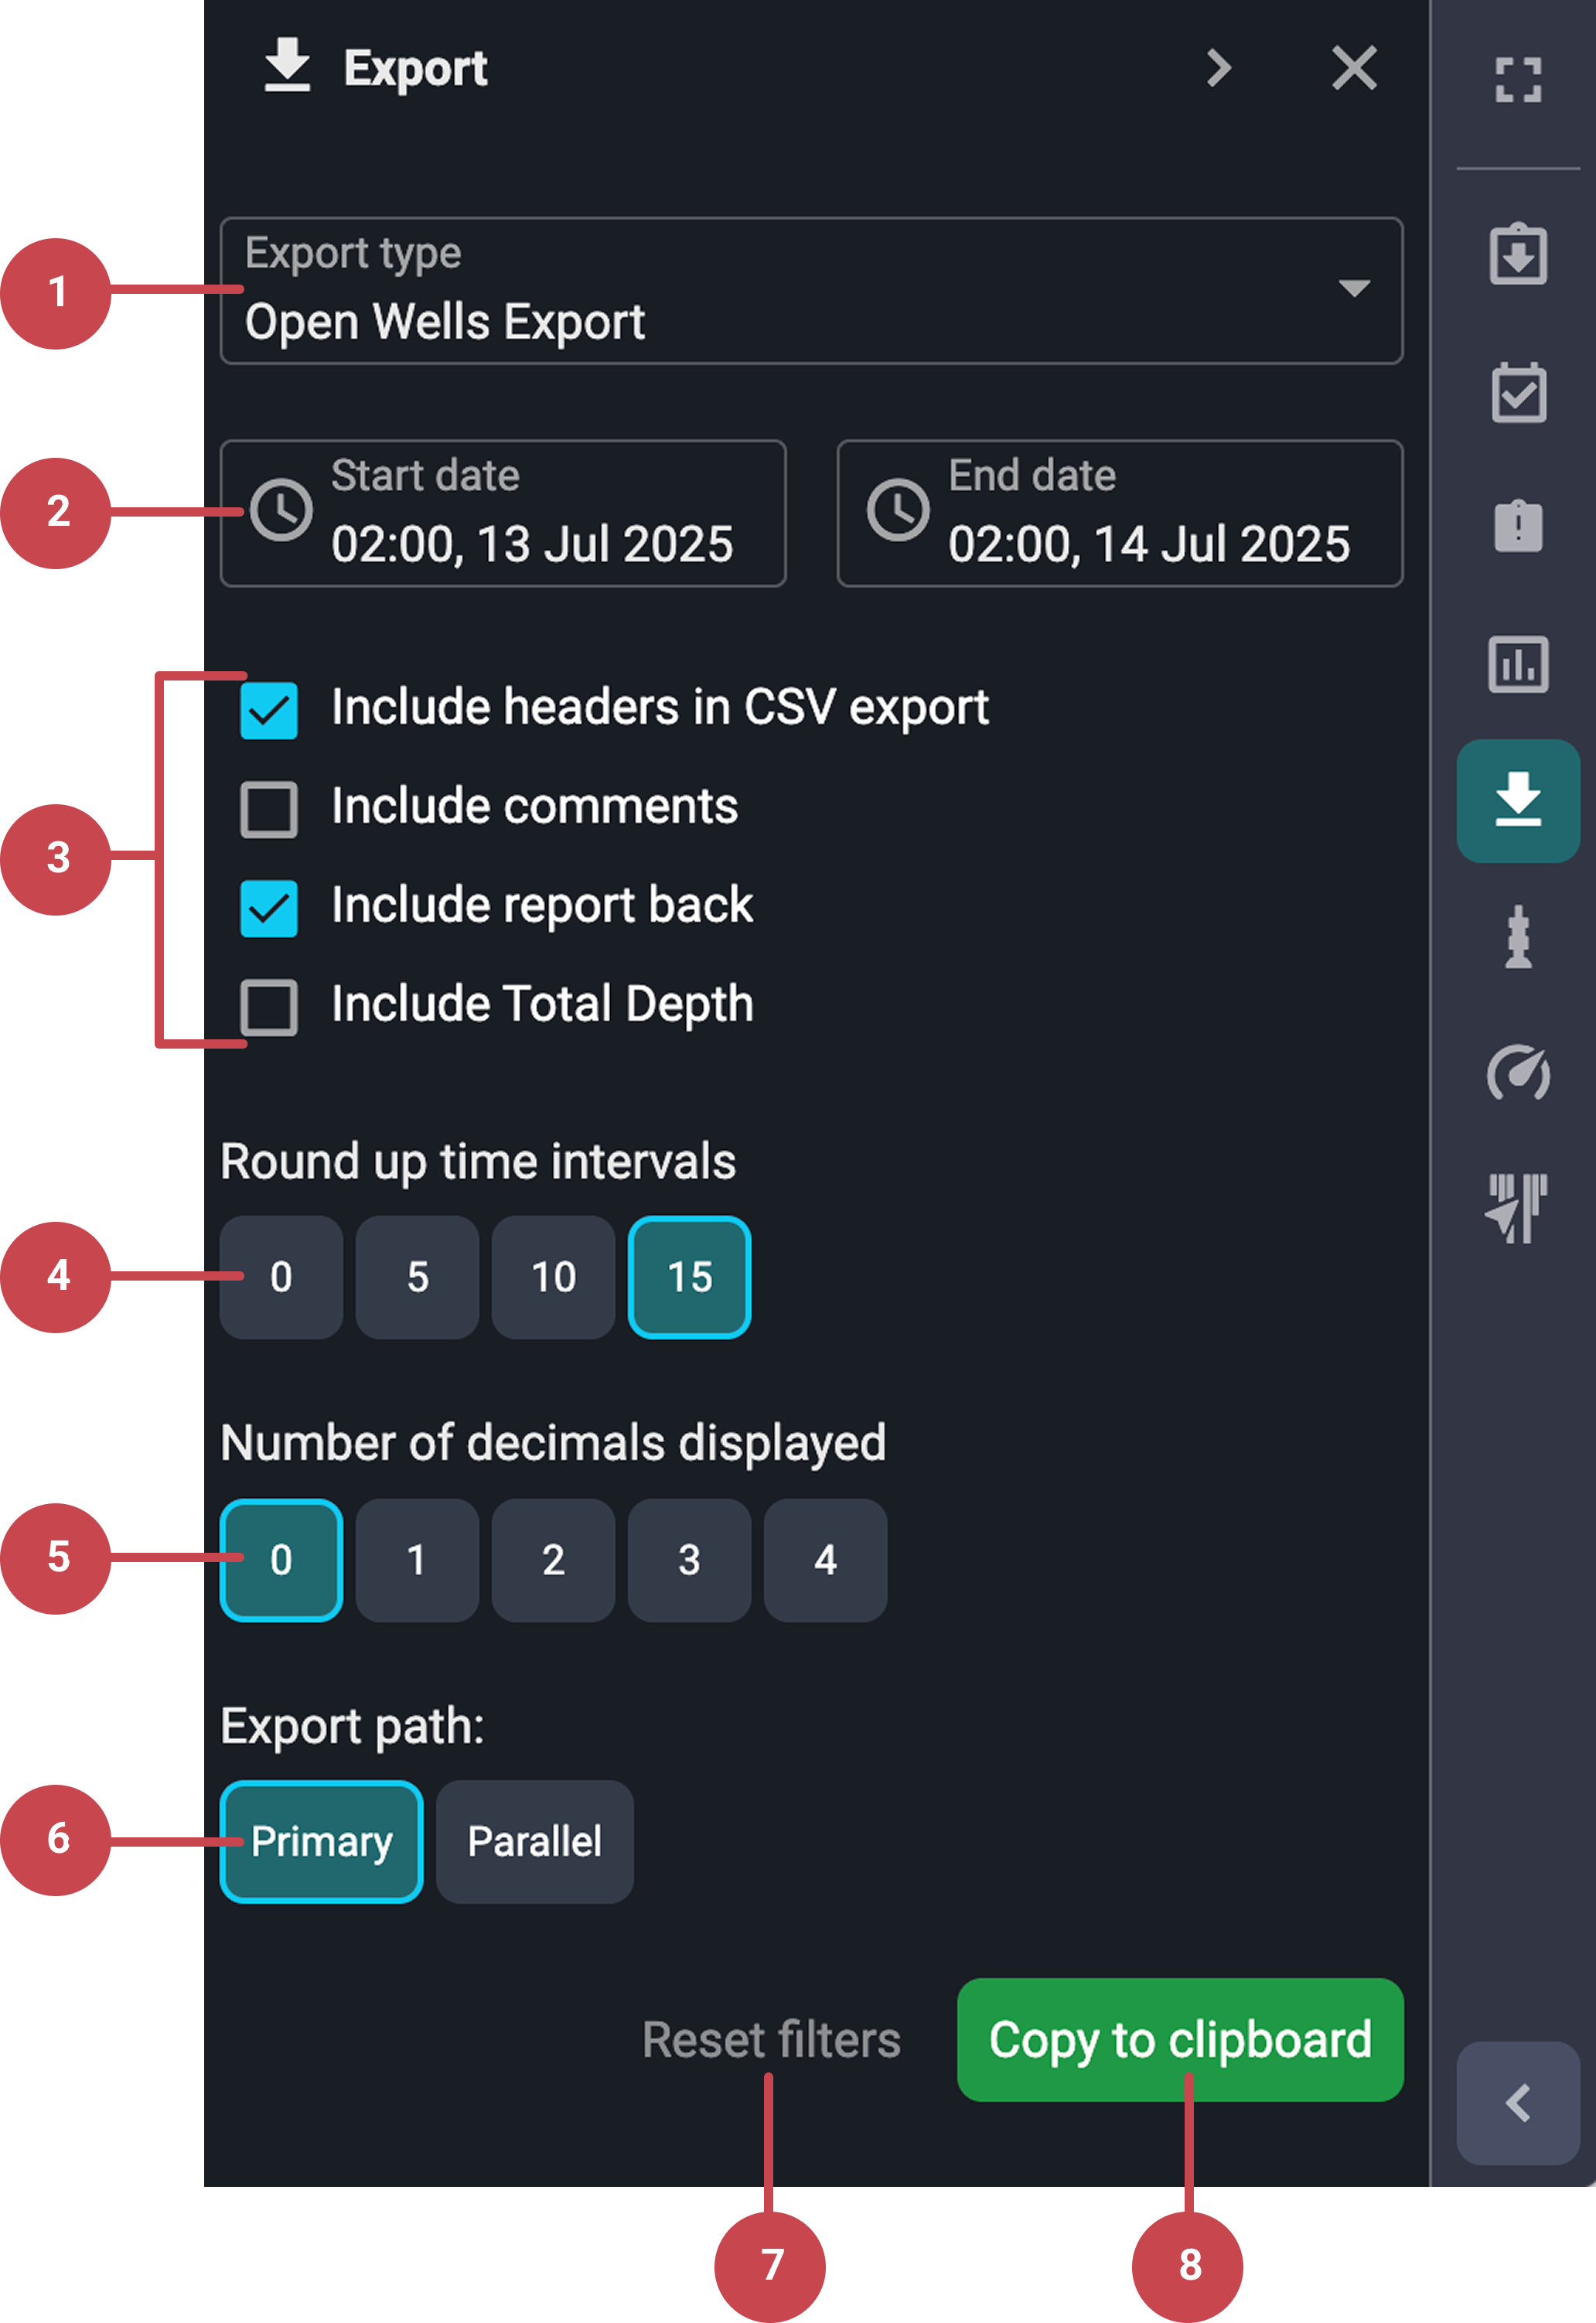
Select export type: This is the first dropdown menu at the top of the Export panel. Always ensure Open Wells Export is selected for correct formatting.
Time frame picker (start and end time): This section controls the period for which the operational log will be exported. Consists of two parts:
Start time and date (left side).
End time and date (right side).
Export content settings: Choose which optional information should be included in the exported report:
Include headers in CSV export.
Include comments.
Include report backs.
Include total depth
Checkboxes are toggled on or off with a click.
Round up time intervals: Used to set how time is rounded in the export. For Open Wells, 15 minutes is the default setting, but you can choose between 0, 5, 10, or 15 minutes. The selected interval is highlighted with a different color.
Number of decimals displayed: Controls numeric precision by choosing based on reporting requirements. The default setting is 0 decimals, but you can choose between 0, 1, 2, 3, or 4 decimals. Your selection changes color when active.
Export path: Shows where the data is coming from. It's set to Primary by default, which covers the main operations. While parallel paths exist for tasks done alongside main operations.
Reset filters button: Useful for quickly restoring standard Open Wells export parameters. It becomes active once you've changed any settings from the defaults:
Include headers in CSV export.
Include report backs.
Time interval to 15 minutes.
Decimal places to 0.
Export path to primary.
Export content button: A green button labeled Copy to clipboard starts the report generation. After clicking, the system compiles the selected data into a
.txtfile.
Step-by-step instructions
Start the export process
Ensure entries: The export pulls data directly from the Operation Log, so make sure all entries are accurate before exporting.
Open the Export panel: Go to the Right sidebar and select
 Export.
Select the export format: Depending on your role, Open Wells will be pre-selected as the default export format. If not, you can choose the export format by using the export type picker.
Set export parameters
Set start and end periods: Adjust the start and end dates and times using the date and time pickers.
Select export information: Choose what information to include in the export by checking the checkboxes. You can choose to:
Include headers in CSV export.
Include comments.
Include report back.
Set round-up intervals: Select one of the round-up time interval options. For Open Wells, the default round-up time is 15 minutes.
Select the number of decimals displayed: Choose the number of decimals that will be displayed on your report. The default setting is 0 decimals.
Choose the export path: The default setting is primary. Parallel paths are typically not editable.
Note
If you want to reset to the default export settings, click on the reset filters button.
Export
Export data: To download the data, click Copy to clipboard. It will be downloaded as a
.txtfile.Upload content: Use this file to upload into Open Wells.
Examples
A driller completing their shift selects the last 12-hour period and includes comments and reports before exporting.
A platform manager ensures that operational logs from both day and night shifts are included in one daily export.
Tips and tricks
Export can be done multiple times.
Ensure that the time range covers your entire shift to maintain accurate logs.
Use the
 Operation Log to make post-execution adjustments before exporting.
Always verify the selected time range and included data before exporting to avoid errors.