Woodside IDS Export in the Operation report builder
The Woodside IDS Export feature in the Operation report builder allows Woodside to efficiently generate, format, and export operational data for IDS reporting. The exported data is automatically structured to meet IDS requirements and downloaded as an Excel file.
How it looks
The Woodside IDS Export feature appears within the Operation report builder in RigFlow. Once selected, the exported data is automatically formatted for IDS and downloaded as an Excel file.
Step-by-step instructions
Adding codes in RigBridge
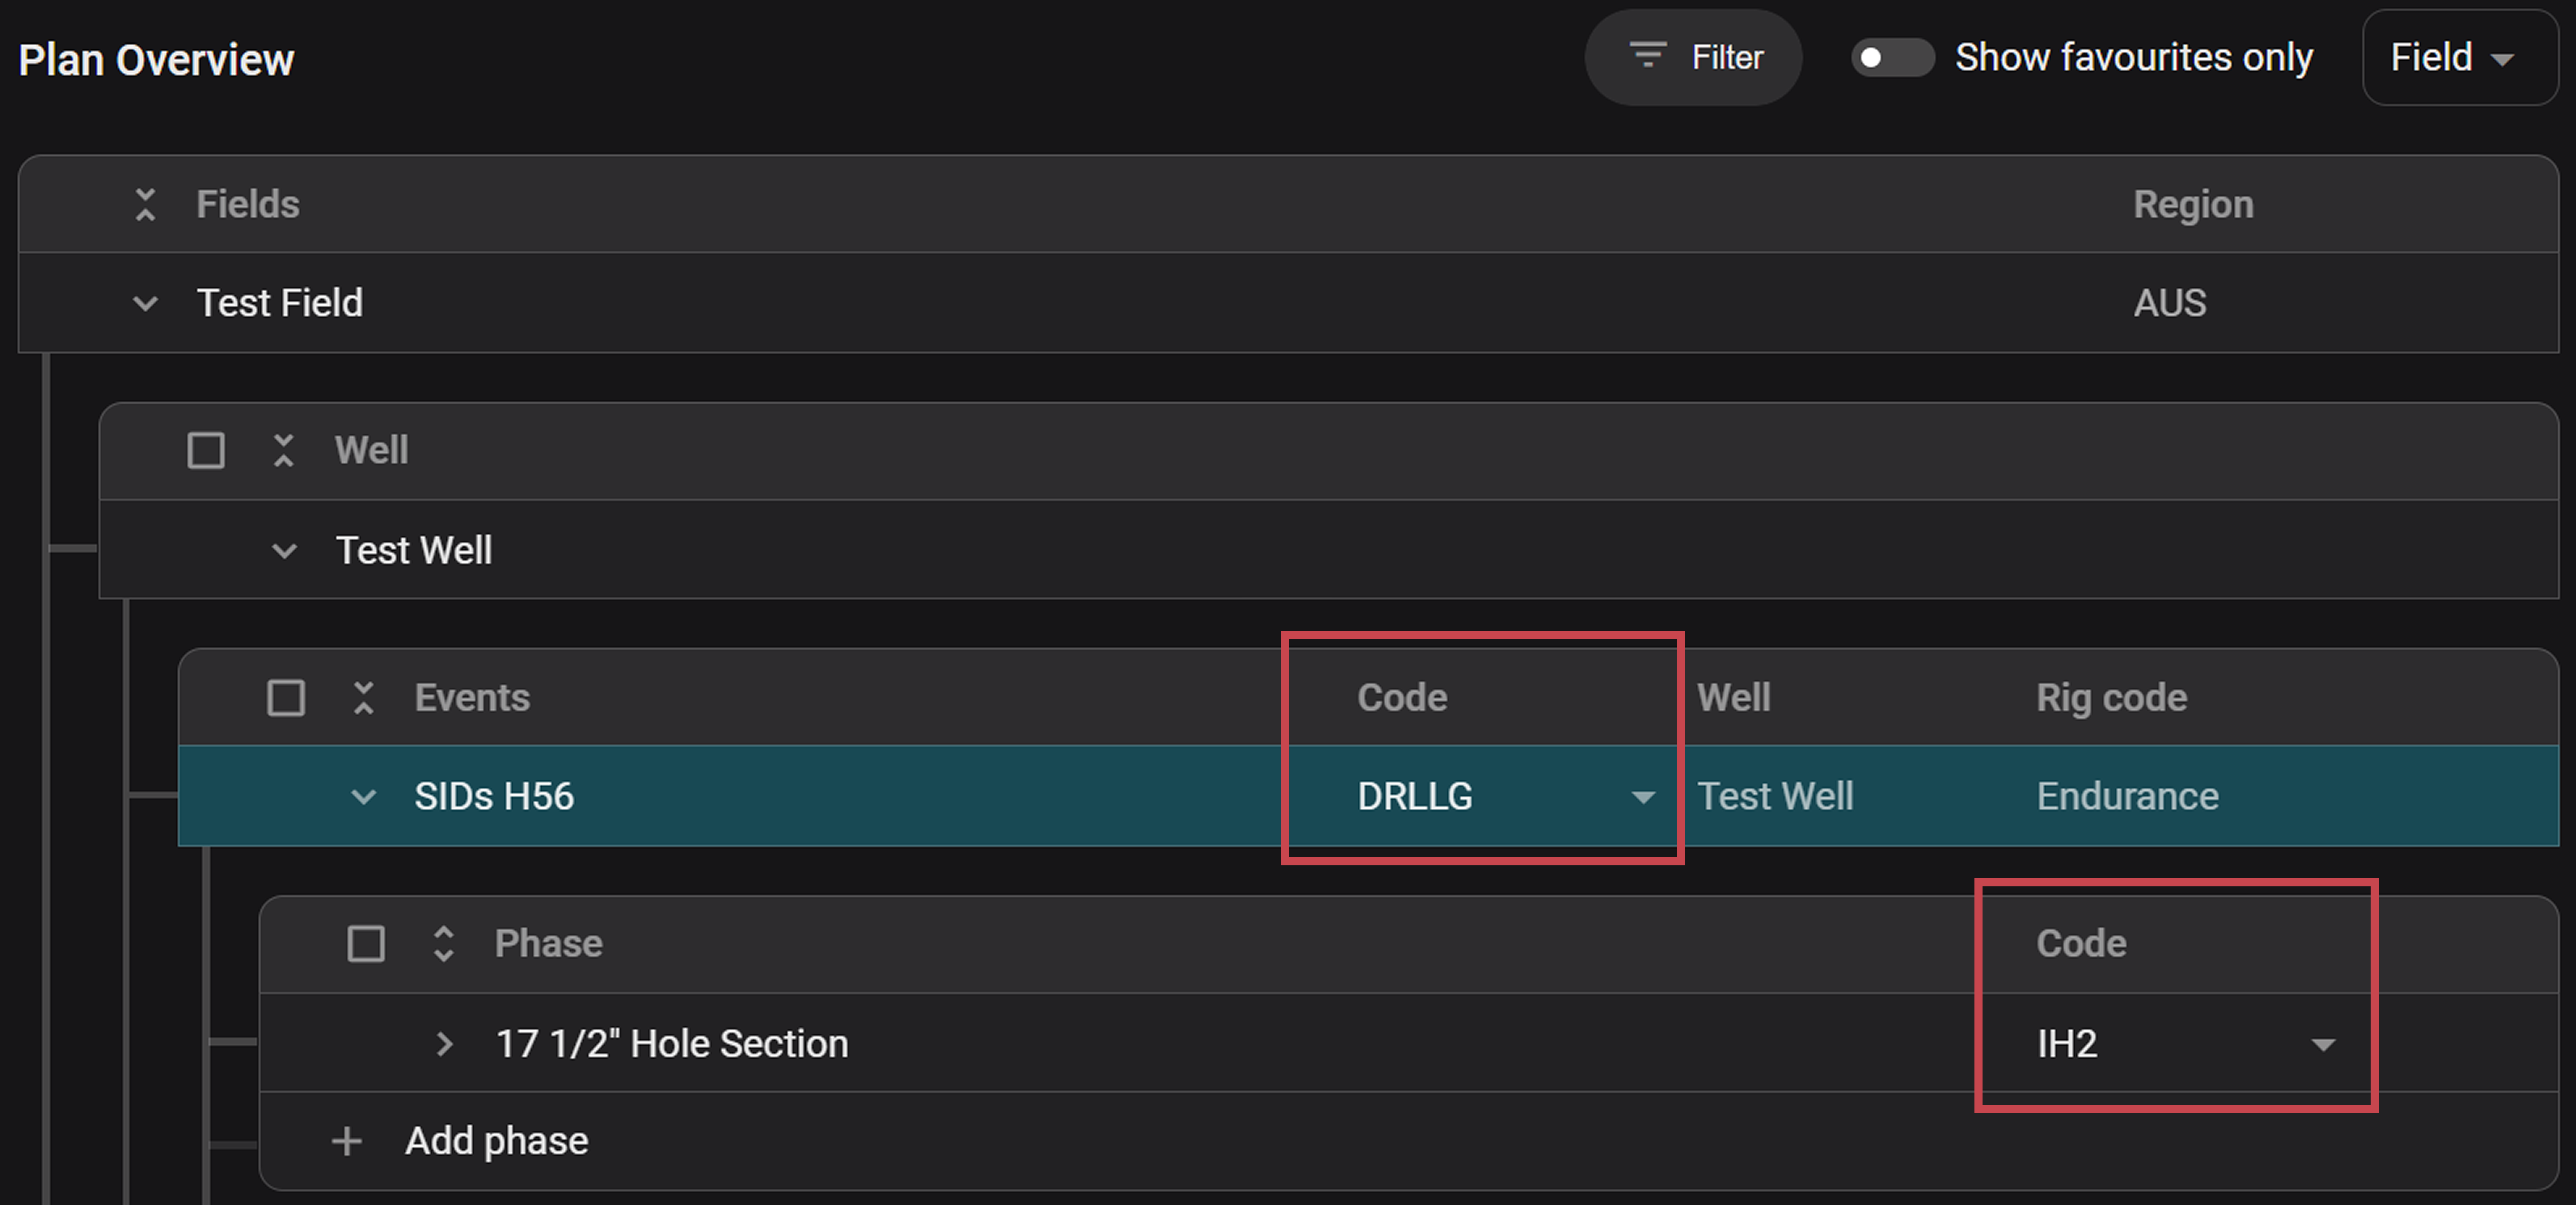
Select Event code: Create a new plan in RigBridge. At the Event level, select an event code. You can scroll through the list or use the search function by typing part of the code or description.
Note
Woodside does not use codes at the Plan or Task level in RigBridge.
Select Phase code: Add a Phase to the Event. Select the relevant phase code using the scroll or search function; both the short code and full description will be displayed.
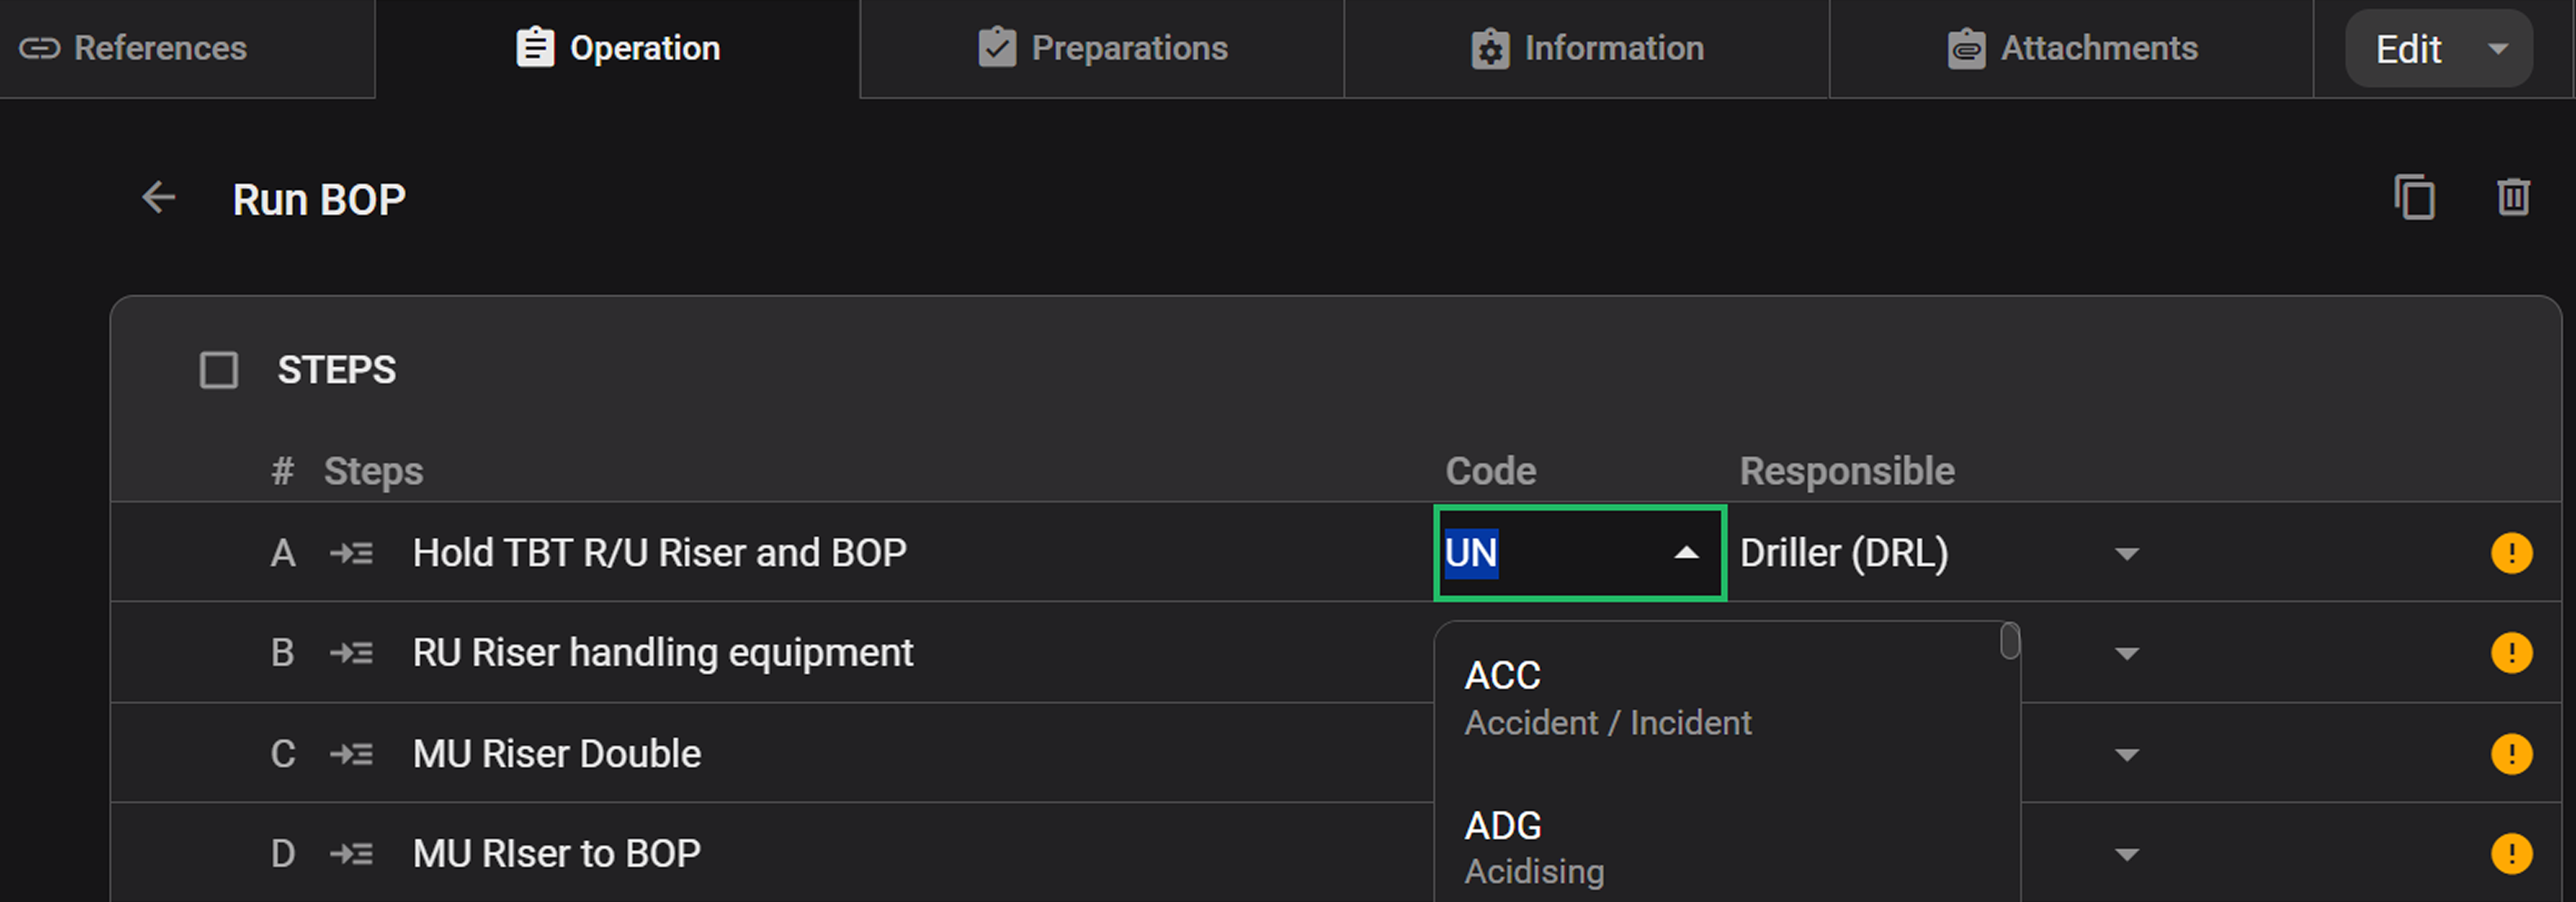
Select Step code: At the Step level, select the appropriate step code using the same method. If no code is selected, the system shows a warning and uses “UN” (undefined) as the default.
Approve the plan: Review and send the plan for approval. Once the plan is approved and executed, the selected codes will automatically transfer to the Operation report builder.
Important
Code selection is required for plan validation and approval. If there are any missing codes, you will get a validation issue warning sign.
Woodside IDS Export in RigFlow
Open Operation report builder: Go to RigFlow and click on the
 Operation report builder icon on the Left sidebar. Read more about the Operation report builder here: Operation report builder.
Click Import from operation log: If the view is empty, click the import option to pull data from the operation log.
Select round times: Click the Round times button in the header to open a panel where you select a rounding interval (5, 10, 15, or 30 minutes). The rounding is applied once, and the times remain fully editable afterward.
Open the Export menu: Click the Export button located in the top-right corner of the Operation report builder. This opens a dropdown list with available export formats.
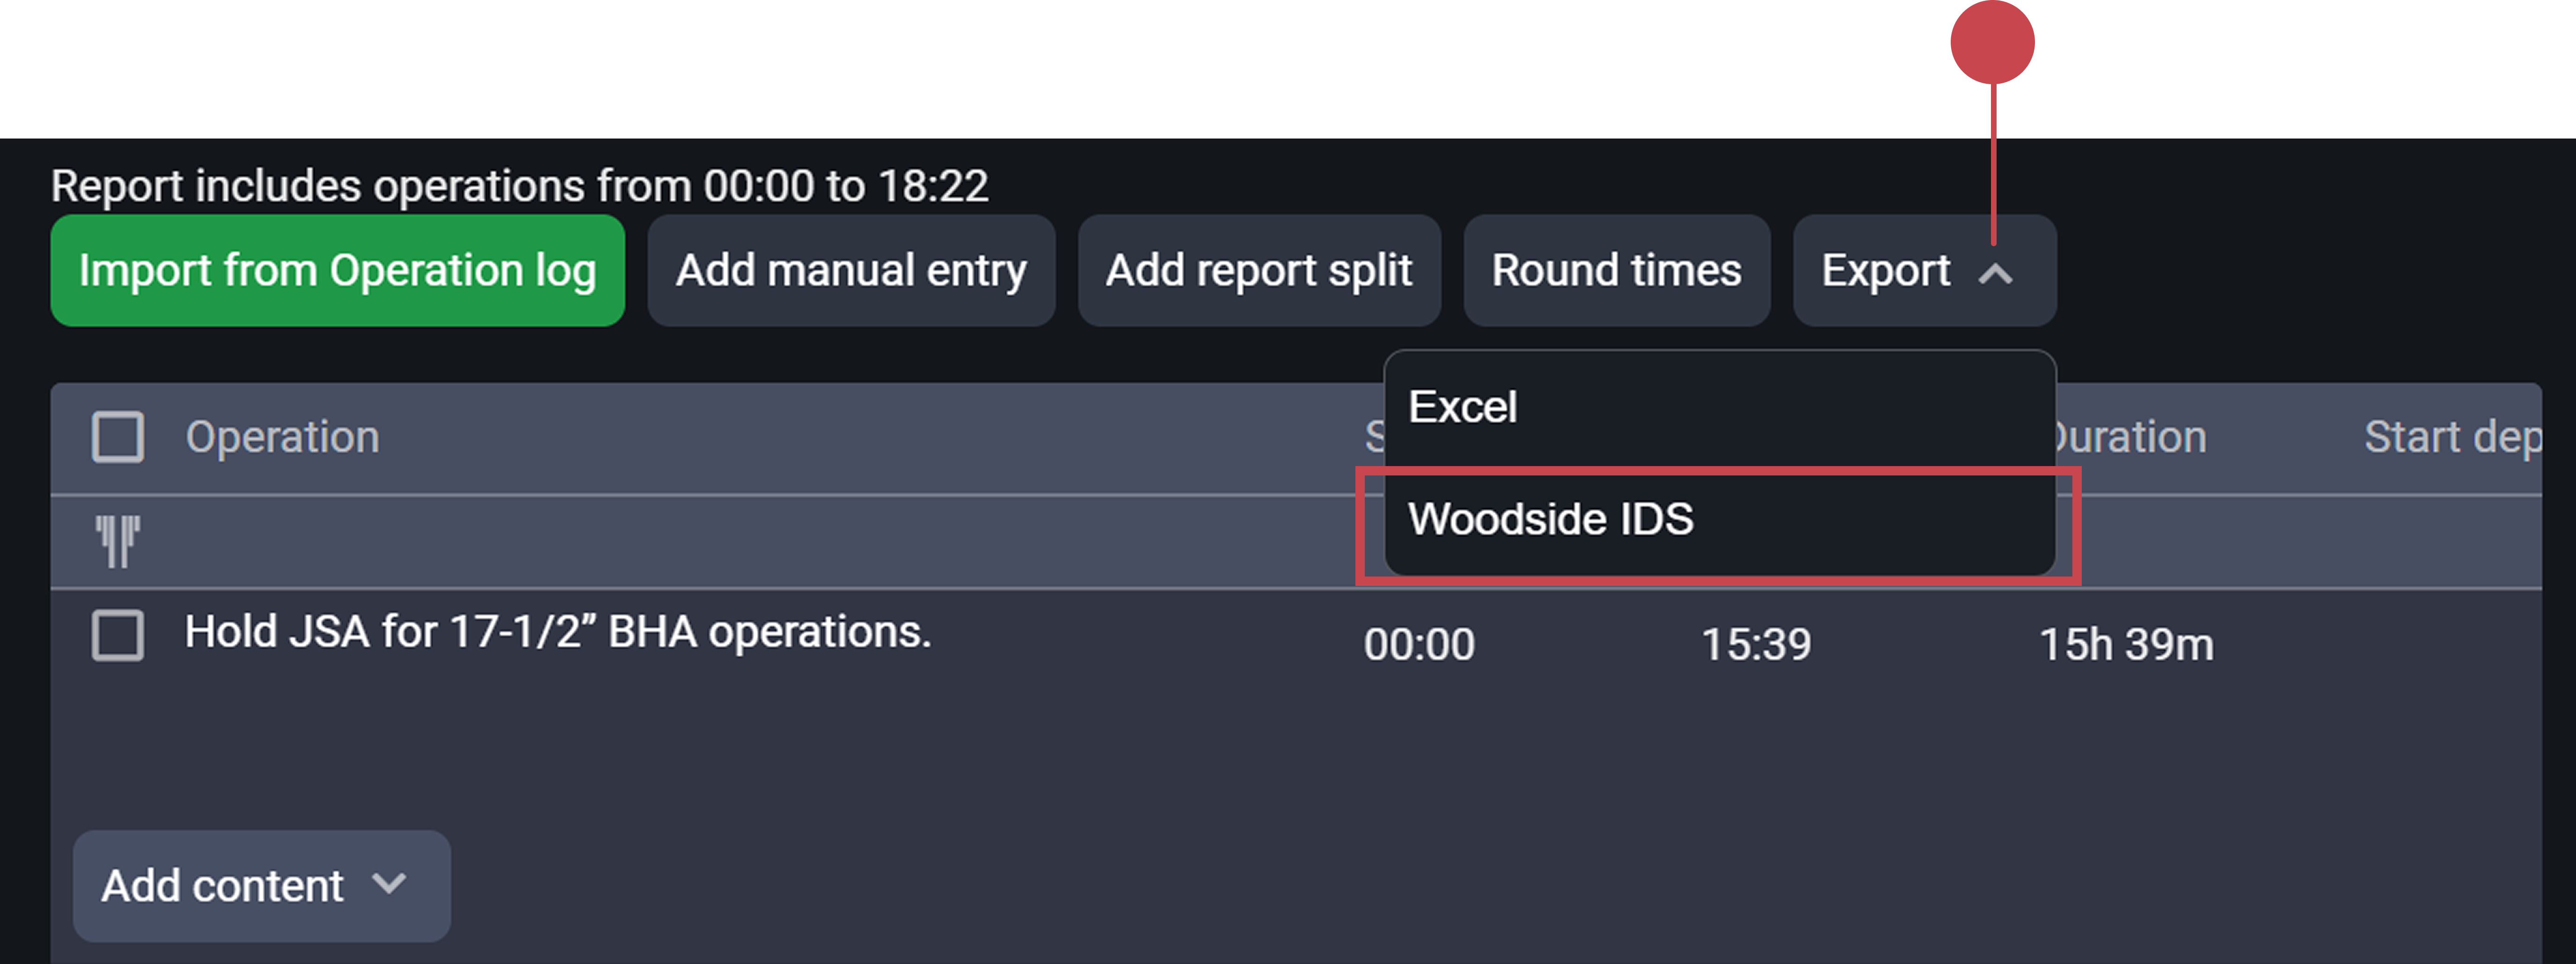
Click Woodside IDS Export: From the dropdown, click Woodside IDS Export. This will generate and automatically download the export file in the correct format required for IDS.
Notice
The exported file will include only the data currently visible in the Operation report builder table. Make sure all relevant steps have been imported and appear in the table before exporting.
Import to IDS: The downloaded file is pre-formatted to match IDS requirements and is ready to be uploaded into their system.