Comments
The  Comments feature in RigFlow allows users to provide feedback and operational comments, leave notes, or raise concerns within the context of a specific step, directly in the application. This feature enhances collaboration and helps track a plan's progress.
Comments can be used for:
Documenting challenges faced during a step.
Providing technical observations.
Sharing relevant real-time sensor data.
Enhancing team communication and transparency.
How it looks
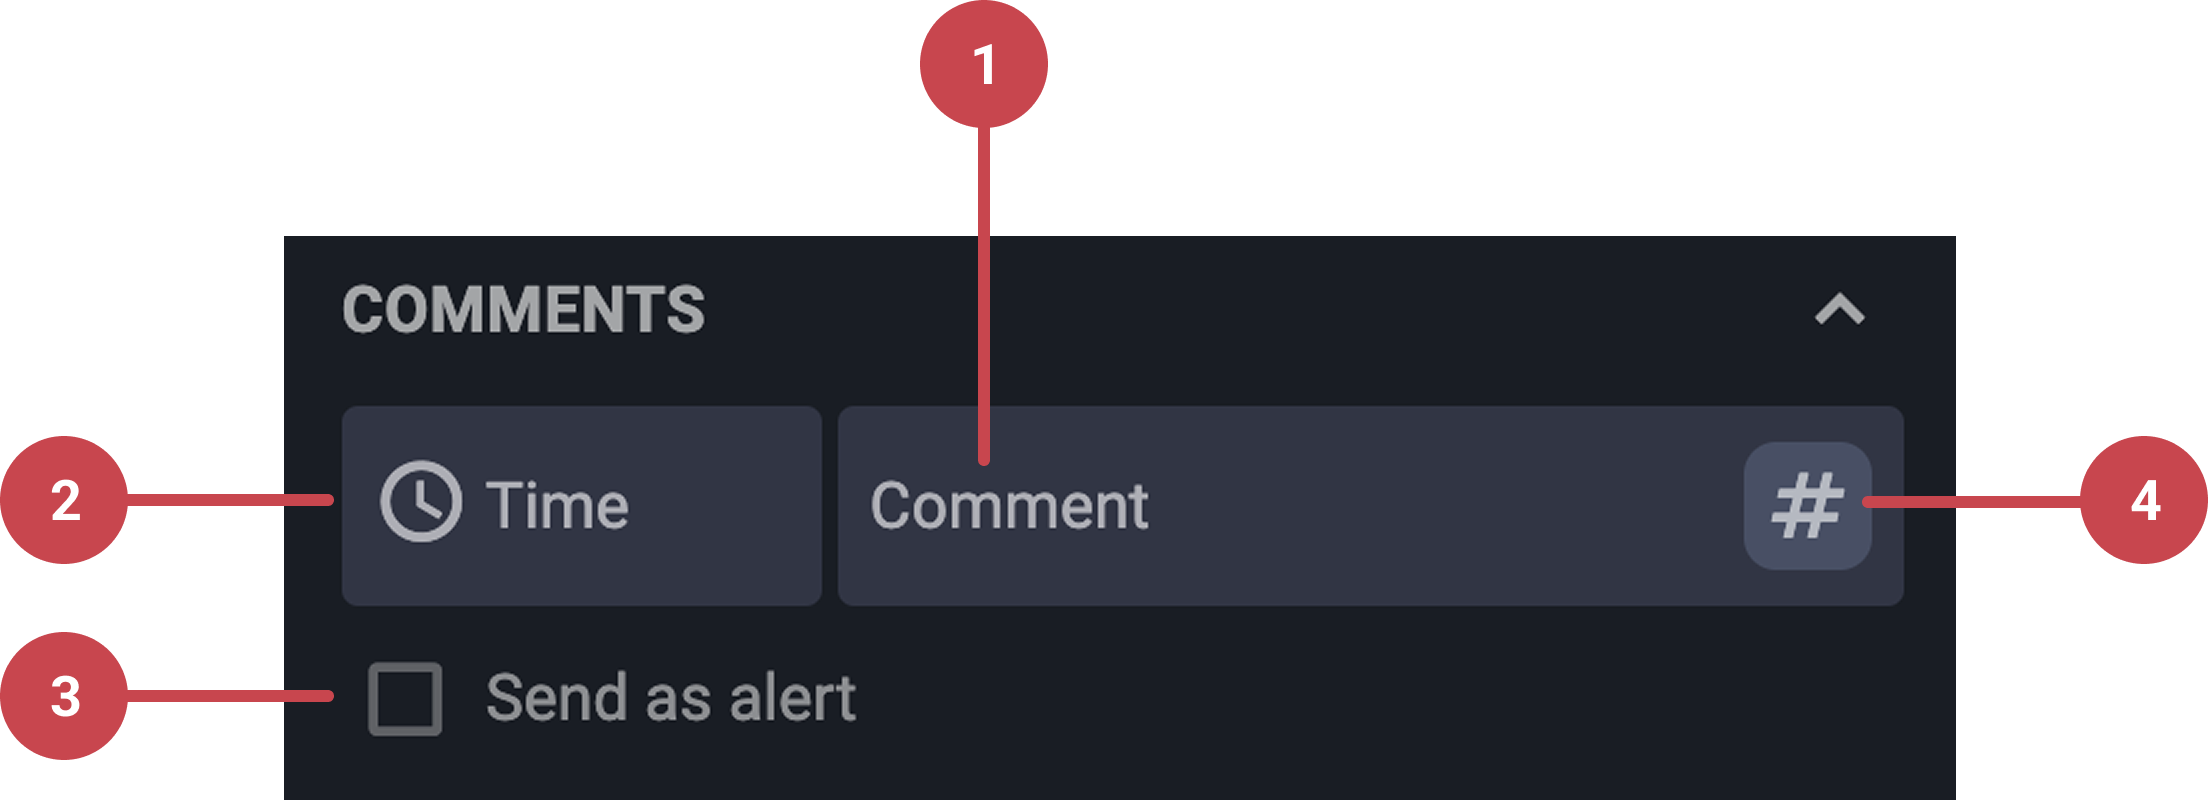
Comment field: Designated space where you type your message or observation.
 Time selector: Located next to the comment field, this allows you to adjust the timestamp of your comment.
Send as alert checkbox: Select this box to trigger a pop-up notification about your comment. The alert will be sent to the person responsible for the step, helping ensure critical information is seen promptly.
# Sensor data: Available within steps in the
 Operation tab under Plan Overview, allows you to insert live or recorded sensor data directly into your comment.
Step-by-step instructions
Accessing comments
Comments can be found in multiple places within RigFlow:
Plan overview - Within a step in the
 Operation tab.
Global Action Bar - Clicking on the
 Comment icon.
 Operation log - Clicking on a step displays associated comments.
Adding a comment
Type a comment: Click inside the comment field or select the
 Comment icon, then enter your message directly into the text box.
Notice
Not all roles in RigFlow have the option to add comments.
Adjust the time and date: If required, select the time and date for the comment by clicking the field
Time next to the comment field.Send as alert: The user can also select send as alert to notify the responsible personnel about critical issues related to the step.
Submit the comment: Once you are satisfied with your comment, click the
 send icon.
Note
It is not possible to reply to a comment; you have to create a new comment.
Tip
A # Sensor data: You can easily add real-time sensor information to comments. Simply type # hashtag or click on it if the button is available, and a list will appear, allowing you to select the specific sensor or sensor group data you'd like to include.
Editing or deleting a comment
Select a comment to edit or delete: Find the comment you want to update or remove and click the
 menu icon beside it and choose
  Edit or
  Delete.
Edit a comment: Click the
edit icon. A window will open, allowing you to modify both the comment text and its timestamp. Save your changes to update the comment.Delete a comment: Click the
 delete icon. A confirmation window will appear asking if you’re sure. Click Delete to permanently remove the comment.
Tips and tricks
Keep comments clear and concise: Be specific in your comments to avoid confusion and ensure your message is correctly understood.
Review before posting: Always review your comment before posting to ensure it conveys the right message and includes all necessary details.
Utilize comments for documentation: Comments can serve as documentation for decisions made during the workflow, so it's useful to reference past comments when making changes.
Use # hashtags for sensor data: Typing # allows you to attach sensor data directly to the comment (e.g., #MW 12.5 ppg.)